15 Bathroom ideas for small bathroom designs in Auckland – 2021 edition
Most of us want a bathroom which is nice and spacious. A bathroom where you can add a nice free-standing bath with a double vanity and toilet is not however possible for most Auckland bathrooms. A lot of bathrooms in Auckland homes feature small toilets and separate bathrooms which are often dark and dingy. Standalone toilets especially seem like they are only there for its functionality and often lack any design element. If you are looking for bathroom ideas for small spaces, then this article is a great way for you to get some inspiration.
Having a small bathroom does not always mean that you must compromise on your bathroom design or luxuries. The key to creating a comfortable and stylish bathroom design lies in good planning. As technology has advanced, there are a lot more options available for flooring and bathroom fixtures that aim to make a small space look larger.
Yes, you might have to compromise on a large bathtub for a small bathroom. However, there are some great alternatives today that can be integrated within your bathroom design to create a sophisticated space.
We have put together a list of 15-bathroom ideas that you can integrate into your small bathroom design for 2021.
1.Add Mirrors
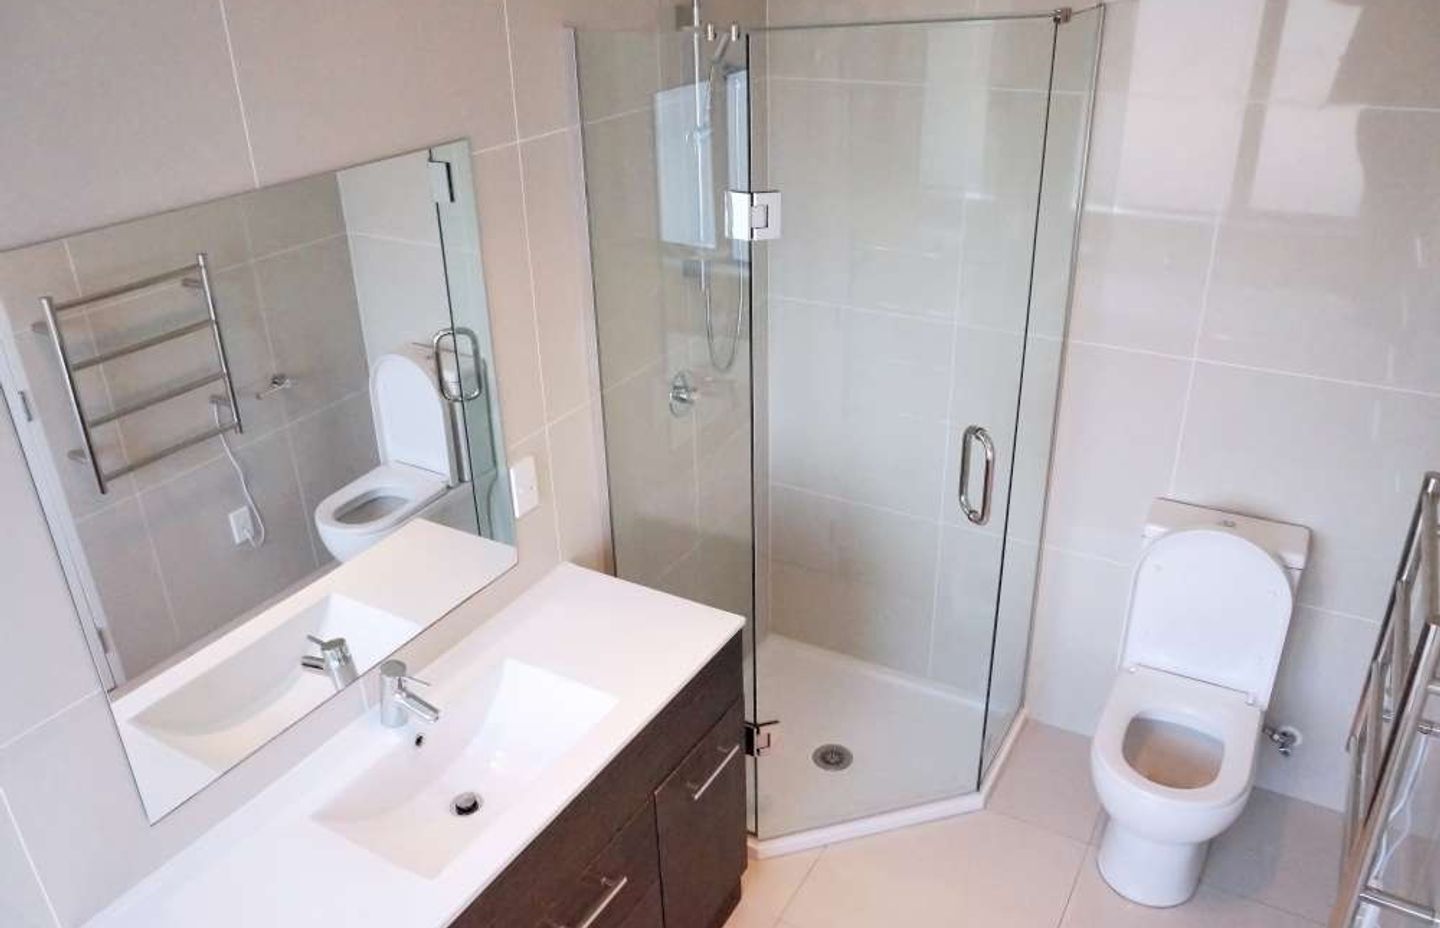
Adding mirror to small bathrooms creates an illusion of space. If you do have a narrow bathroom with one wall empty of any fixtures, then you can add a mirror across the whole wall. This is often seen in hotels and it in fact doubles the perceived space of your bathroom.
If you are not yet ready to install mirrors across the entire wall, then you can install a large mirror above your vanity which will also help make your bathroom look bigger. Another great way to soften your bathroom design can be to install a round mirror instead of a square or rectangular mirror.
Mirrors also reflect light which means that you can get your bathroom more well lit without adding any additional light fixtures or windows.
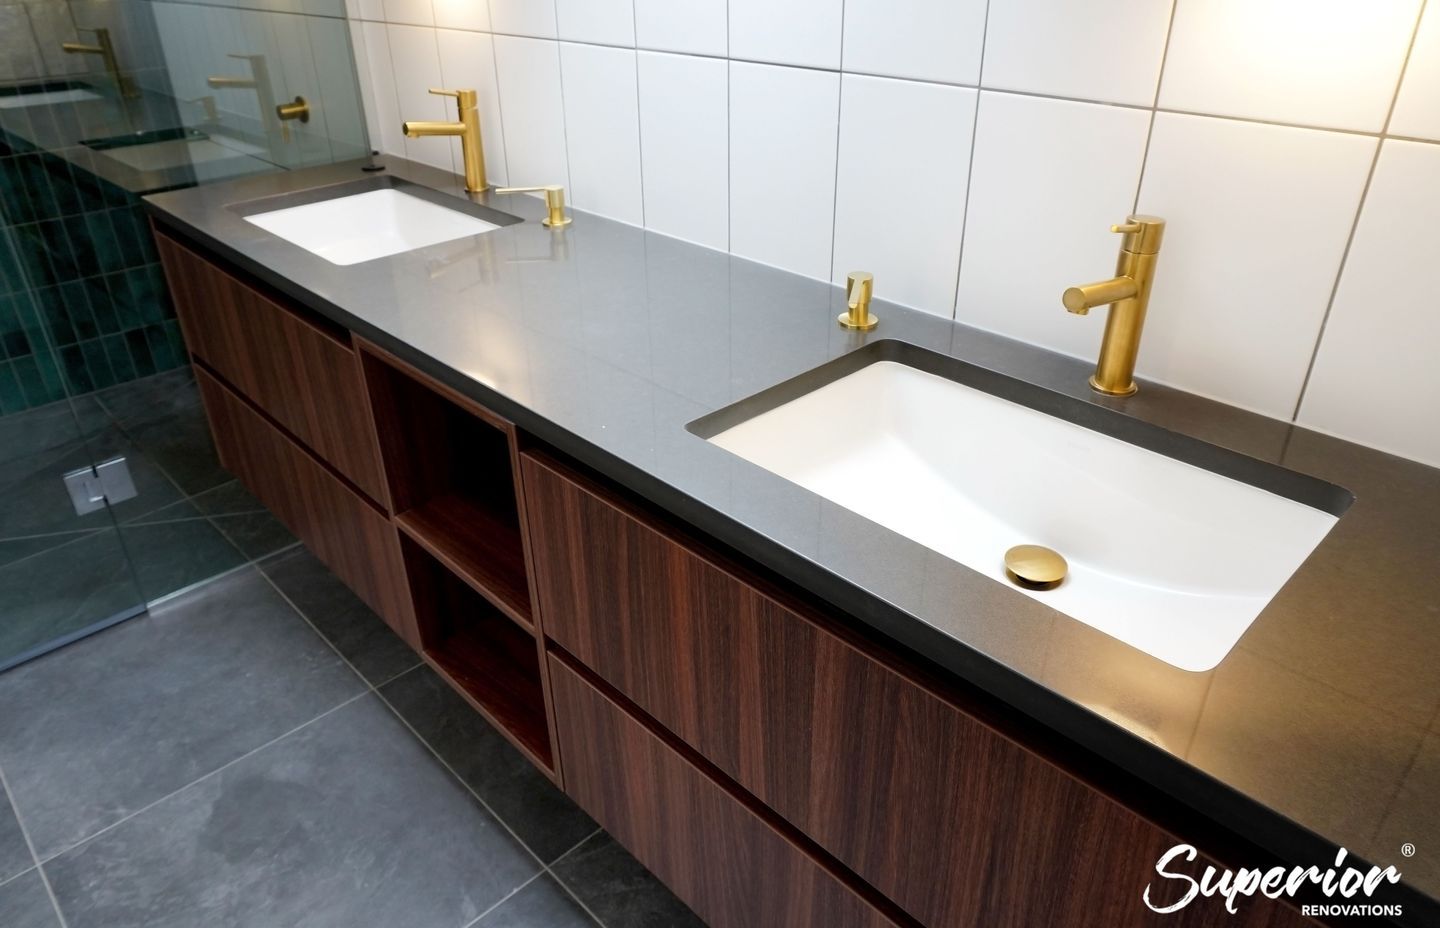
2 Floating Vanities
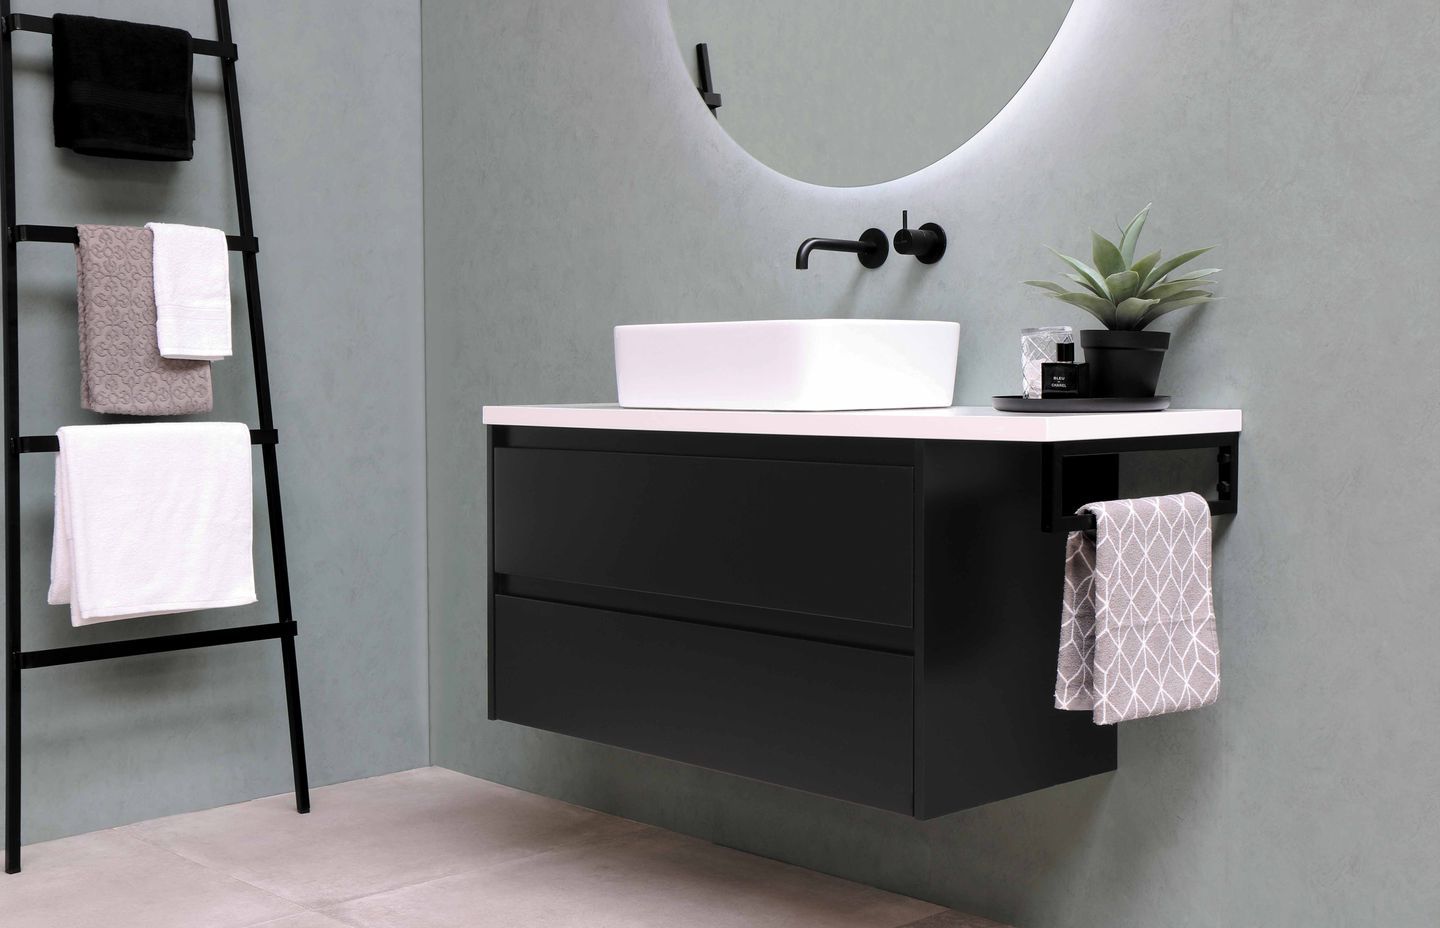
Floating vanities are a great option for smaller bathroom designs. They look less cumbersome and save you precious floor space. Floating vanities also allow you some extra storage beneath them. You can add a couple of baskets which can be placed under the vanity. You can store toilet paper, cleaning products and other bathroom items in these baskets.
Having floating vanities in your bathroom does not mean that you have to go for a modern or contemporary look. In the last decade or so floating vanities were mostly incorporated in modern bathroom designs. Today however there are many styles to choose from as bathroom suppliers have adapted floating vanities in various styles. They can also be easily custom built in a traditional, cottage or industrial style.
Related article: A vanity range that pays close attention to the latest bathroom trends

Read Project specifications for above projects
Floating vanity in a modern style for a bathroom renovation in Greenlane
Floating vanity in a Rustic style for a full bathroom renovation in Westmere
3 Larger Floor tiles
Often people think that large tiles should only be used in larger bathrooms but this is far from the truth. Large tiles in fact are great for smaller bathrooms as they have lesser grout lines. Lesser grout lines mean that there is more continuity as there are lesser ‘breaks’ on the bathroom floor.
Kitty from depot recommends using 600 by 600 square tiles or 600 by 900 tiles rectangular tiles for smaller bathrooms.
As seen below from our renovations in Auckland, most small bathrooms benefit from larger tiles as they give a sense of continuity.
Examples Bathrooms with 600 by 600 and 900 by 600 tiles
3 bathroom renovated in St Heliers with Medium brown 600 by 600 tiles on the floors
Small Bathroom renovation in Papatoetoe with textured walls and large 600 by 600 tiles
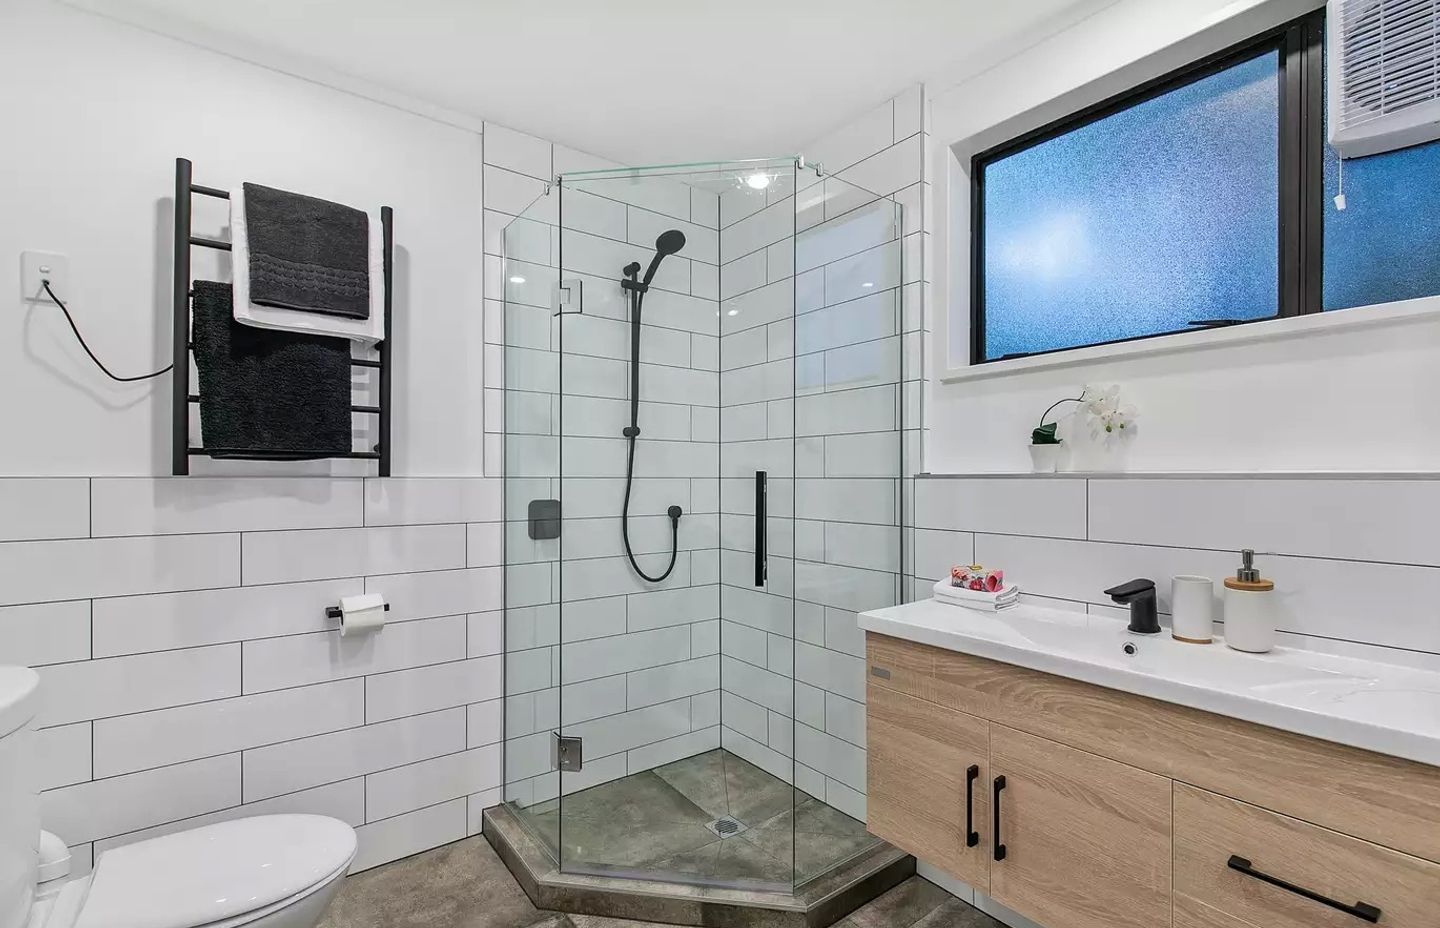
4. Wet Areas
Wet areas have always been popular but had seen a decline in popularity with the invention of plastic shower boxes. They are however becoming popular as they allow a space to look larger and are aesthetically more pleasing than shower boxes.
A wet area is usually a tiled waterproofed area of your bathroom with a fitted shower head. They are not fully enclosed as a shower box. They are usually partially separated from the rest of the bathroom with a glass or in some cases they are completely open.
Some people prefer having their wet area in a slightly different floor level than the rest of the bathroom. Wet areas are less cumbersome looking and make your bathroom seem more spacious.
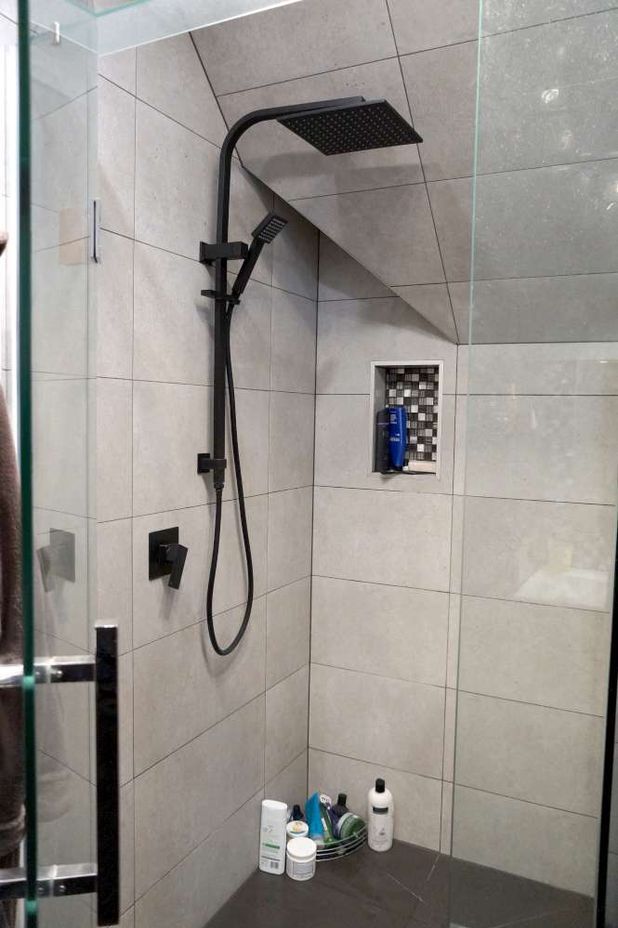
The wet area created below is a great example of utilising a space in an awkward bathroom area. Installing a shower box was not possible under the roof area. A wet area was created under the triangle roof area which was separated from the rest of the bathroom by a custom built glass.

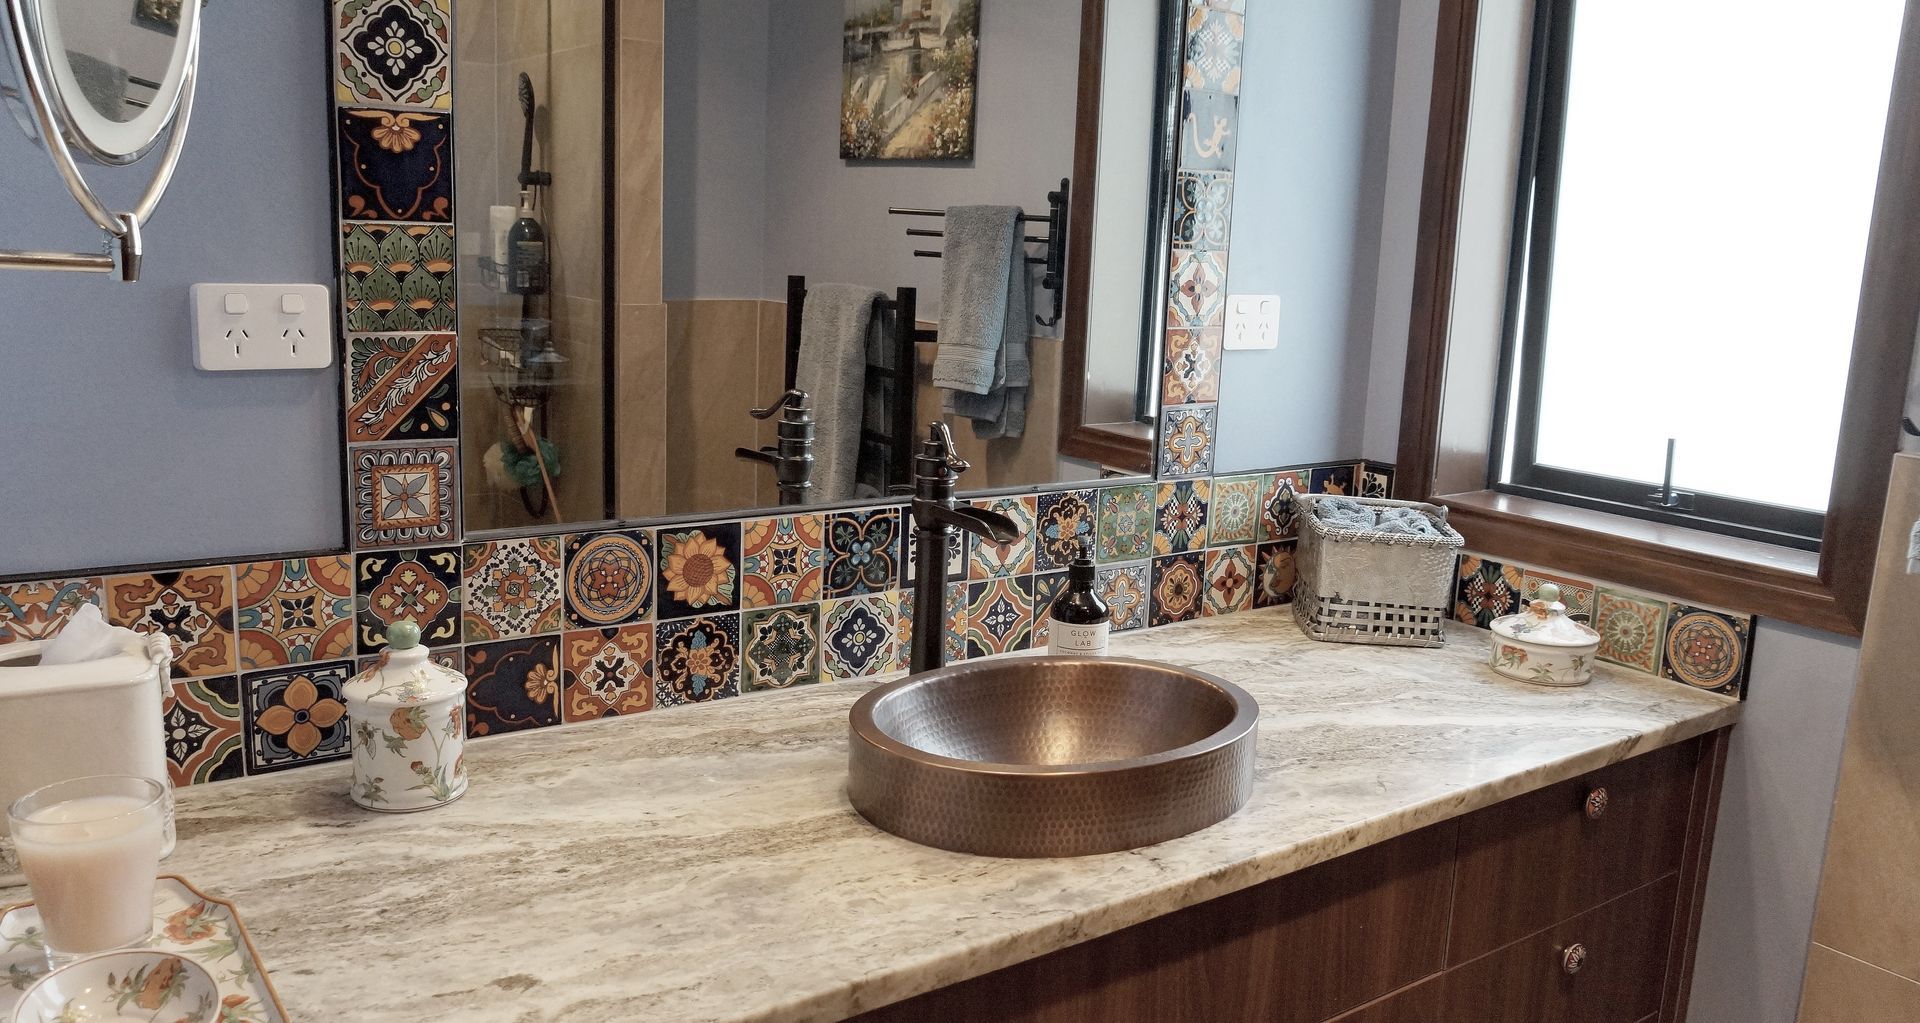
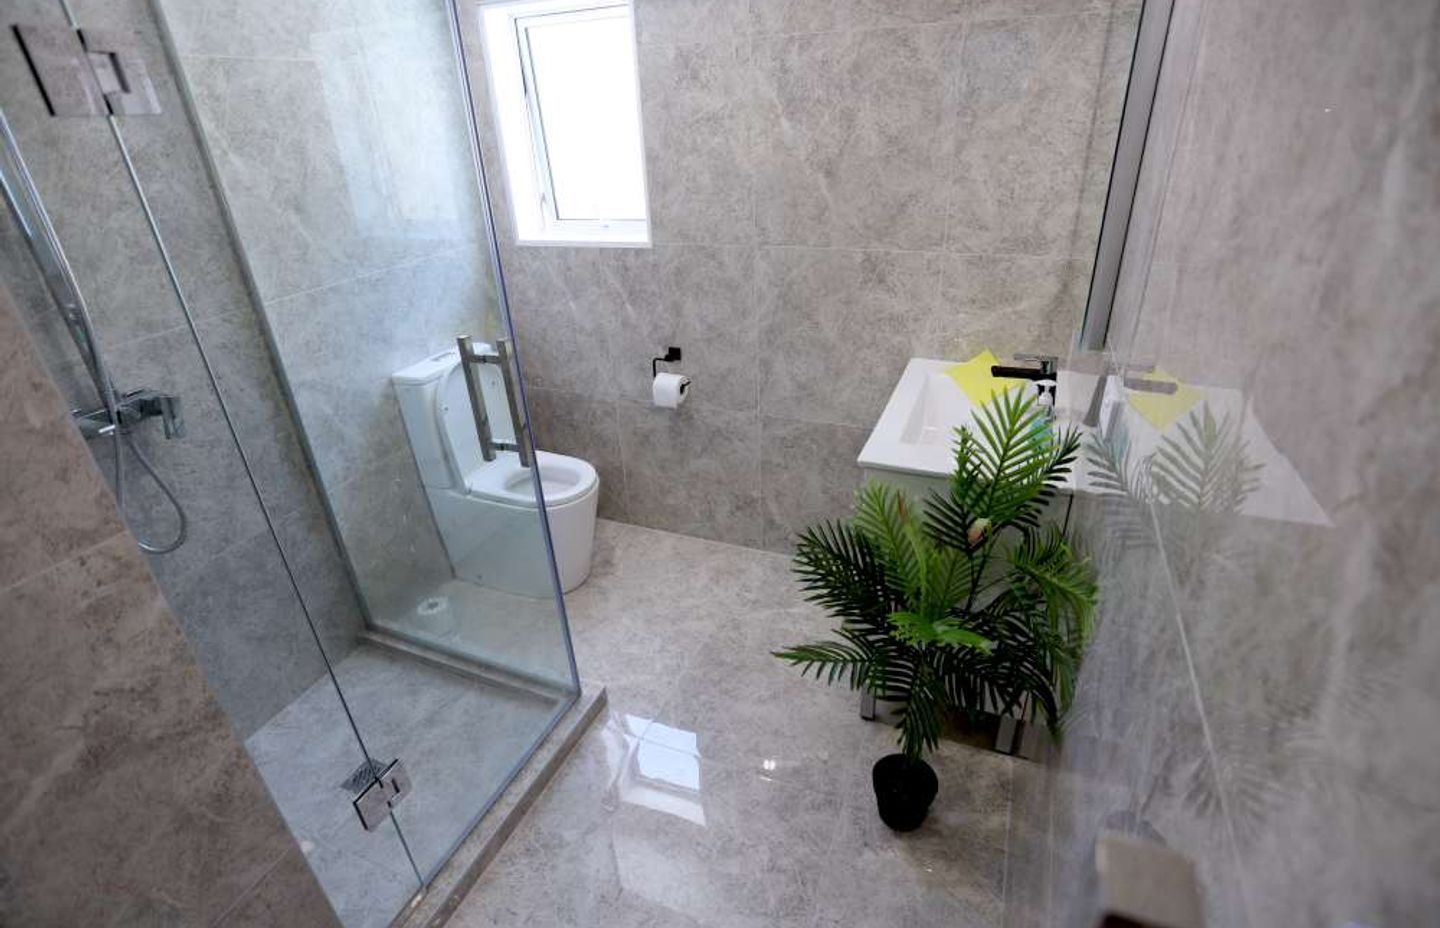
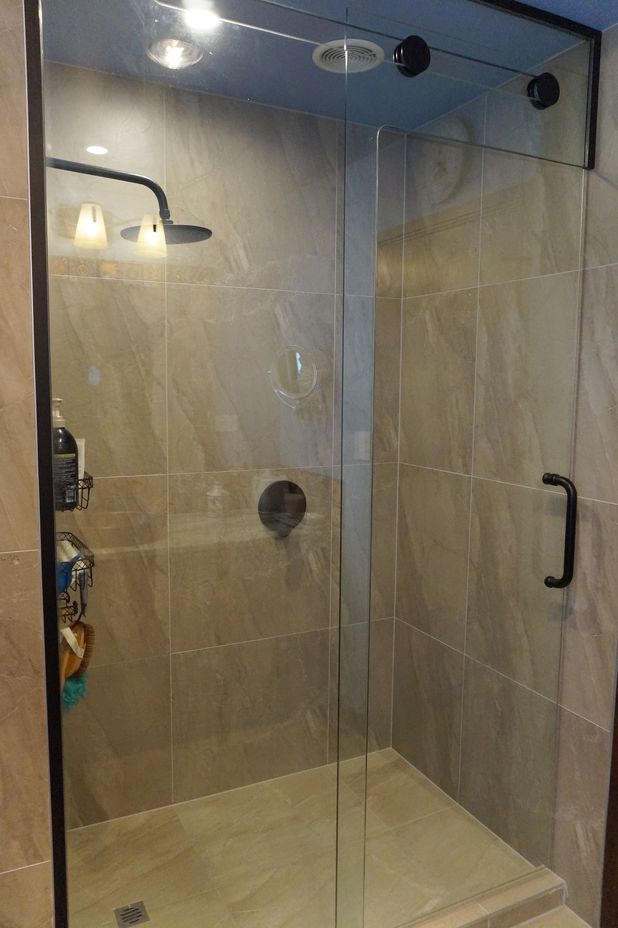
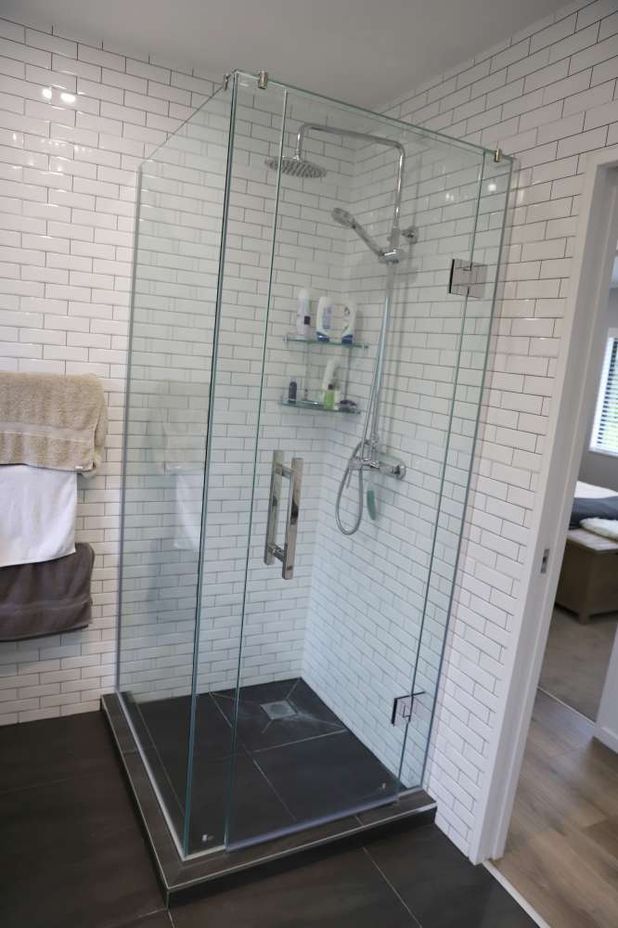
5. Shower with Glass doors
If you are not quite ready for a wet area yet, then another idea would be to install a shower with a glass door. Steer clear of enclosed showers with raised trays. Instead you should opt for a cleaner look with walk in showers using a clear glass. Raised tray showers with plastic shower boxes have become very dated and make a small bathroom look very closed in.
Full Kitchen and Bathroom renovation in a Spanish Rustic style in Stanmore Bay, Auckland
The bathroom below is a great example of how a small space can be made to look spacious if it is planned and designed well. The patterned floor tiles add an artisan element to the bathroom. The white horizontal tiles create an illusion of height and space. The glass door shower does not make the bathroom look crammed.
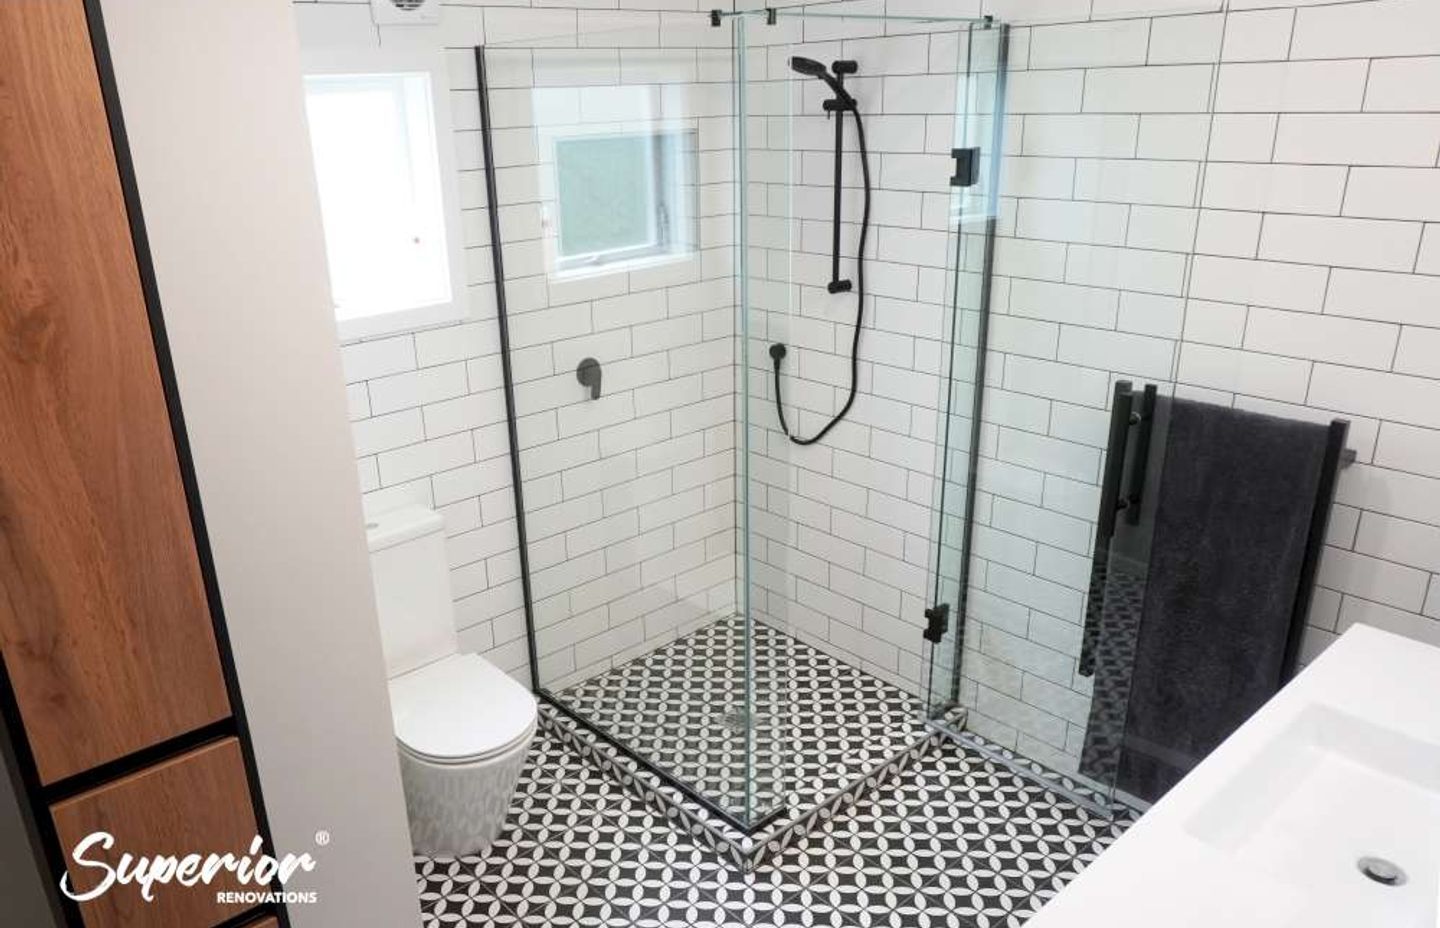
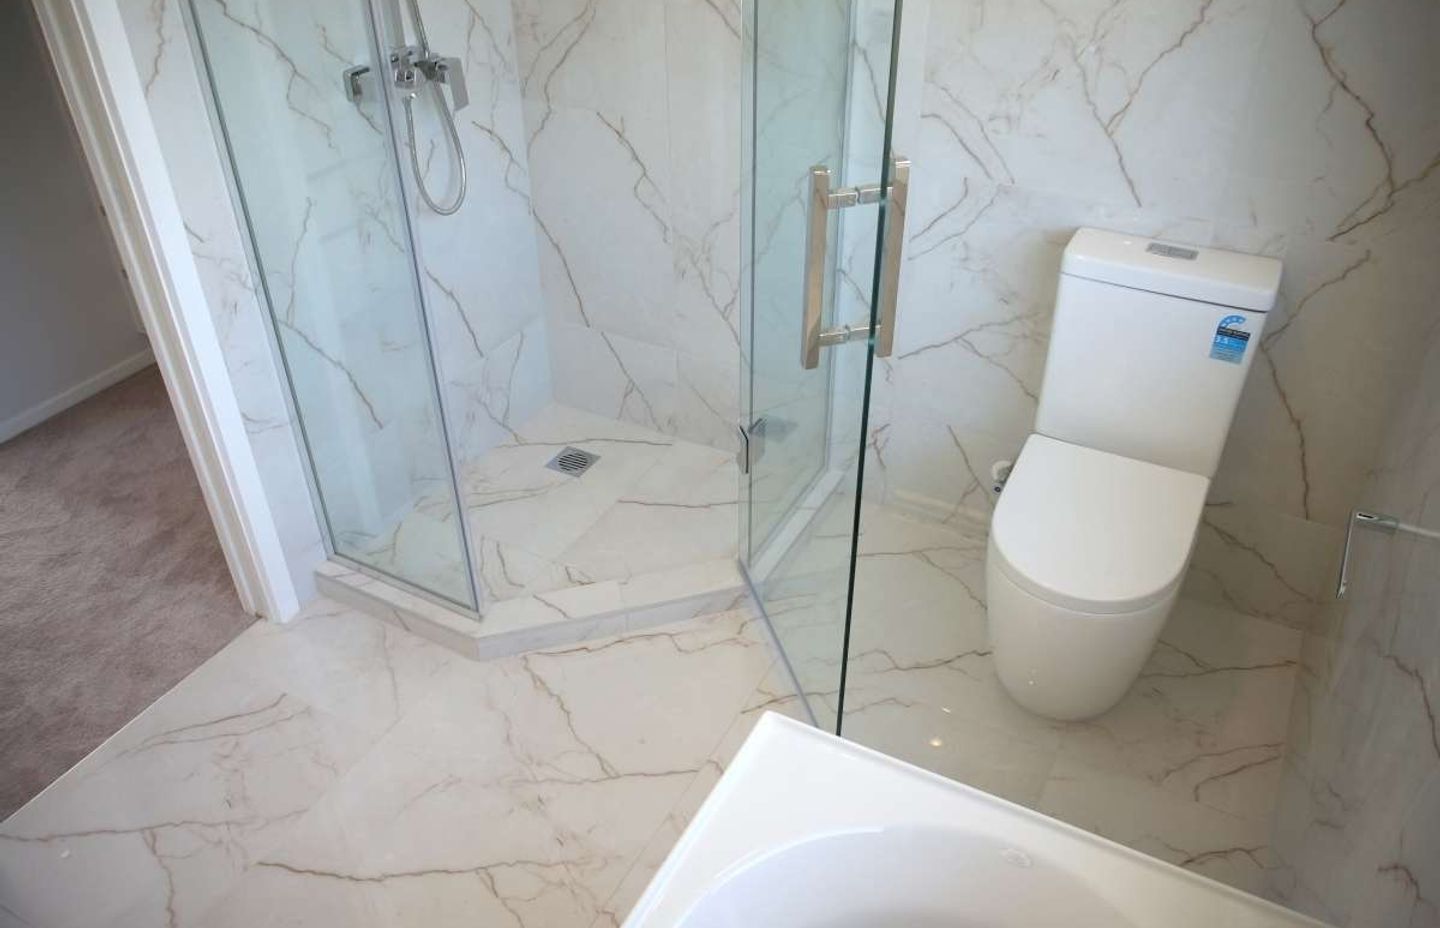
6. Install a tiled shower in the L shaped corner
Utilise the corner space of your small bathroom effectively. People often end up putting a wastepaper basket or a plant in the corner of their bathrooms without realising that they could use the L shaped place for a shower.
Tiled showers with a glass door can be easily built in these tricky L shaped corners, allowing you a space for additional fixtures or even a small bathtub.
For example, if you take the bathroom that we renovated below, had a fairly small space to work with. Our client Todd however wanted to have a shower and a bathtub in the space. We then decided to use the corner space of the bathroom was a small, tiled L shaped shower.
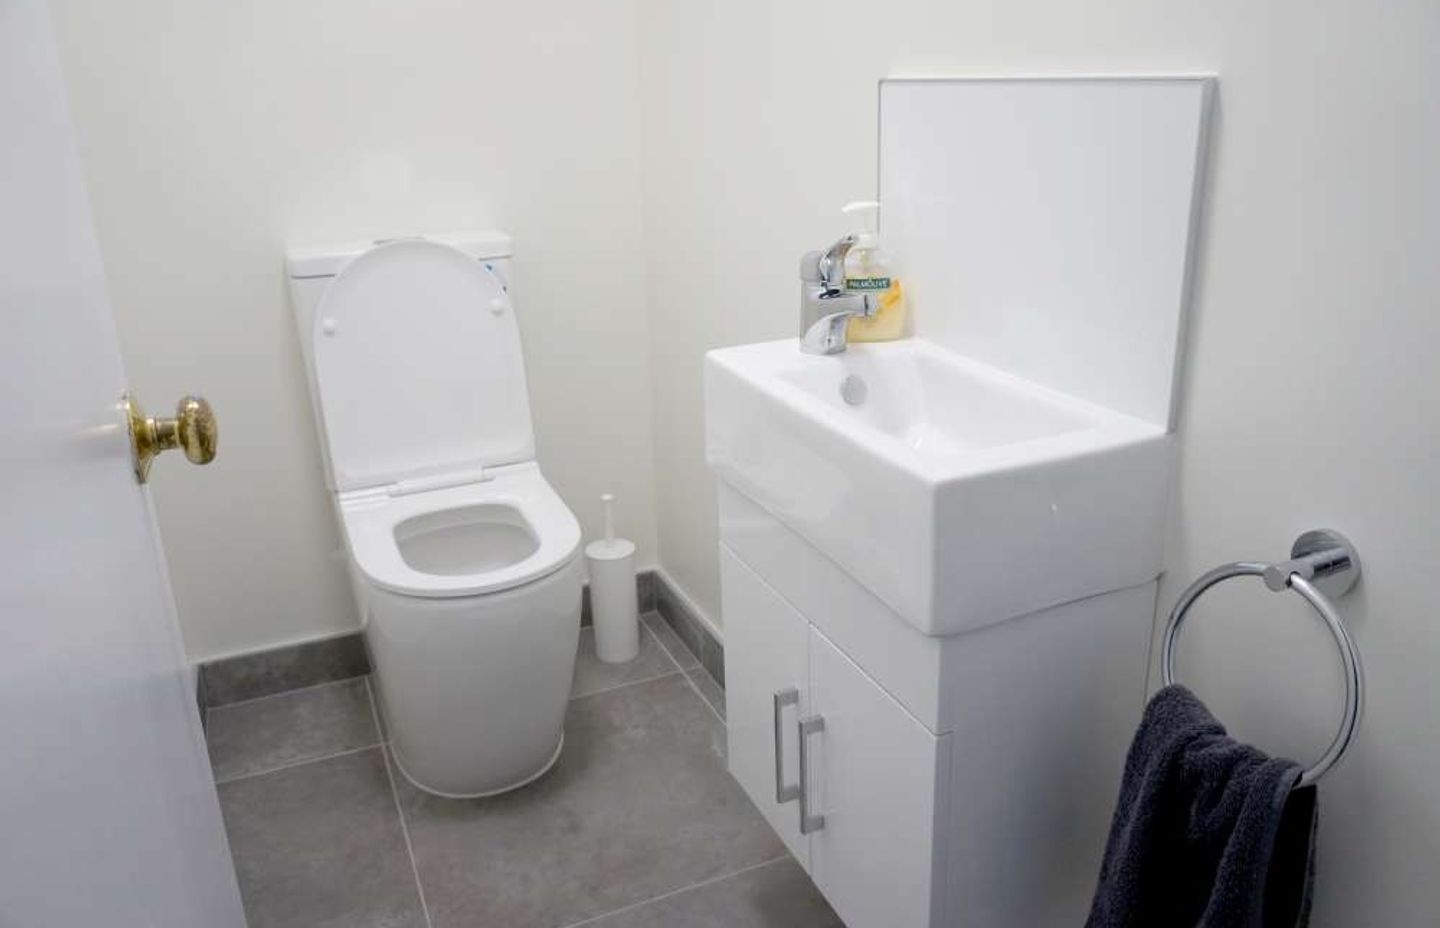
7. Pocket doors
The problem with small bathroom is that everything seems to be in the way of something else. If you replace your bathroom door with a pocket door then you will be able to give your bathroom a cleaner and uncluttered look. A pocket door slides into the door cavity instead of opening into a hallway or your bathroom. To install a pocket door, you will have to open up your doorway to create a cavity but this will give you up to 9 square feet of usable space. This way you can create more storage or install a toilet next to the door without worrying about the door coming in the way.
This bathroom showcased below was previously two separate rooms with one being the toilet and the other a bathroom. We demolished the wall between the two to create an ensuite bathroom. The door was also demolished and a pocket door was installed instead.
8. Floating Toilets
One of the biggest aims of bathroom design for small bathrooms is to make it look uncluttered. Floating toilets are another way to make your bathroom look cleaner and less cluttered. Floating toilets are usually seen in modern and contemporary bathroom designs but can be integrated within other design styles as well.
9. Create an illusion of Height for low ceiling bathrooms
If you have a low ceiling in your small bathroom then you might want to look at ways of creating an illusion of height within your bathroom design. Create depth with 2 different colours on your bathroom wall. Think about colouring your bathroom wall or tilling half of your bathroom wall with a darker colour.
The midway point till the roof can then be coloured in a lighter colour. By lower the eye with a darker paint or tiles you will create a distance from the upper portion of the wall. This will create more depth rather than having the same colour throughout the wall.
Try using vertical tiles if you are tiling your wall as works great in small ceiling bathrooms.
Related Article: 10 best bathroom vanity materials to style your bathroom

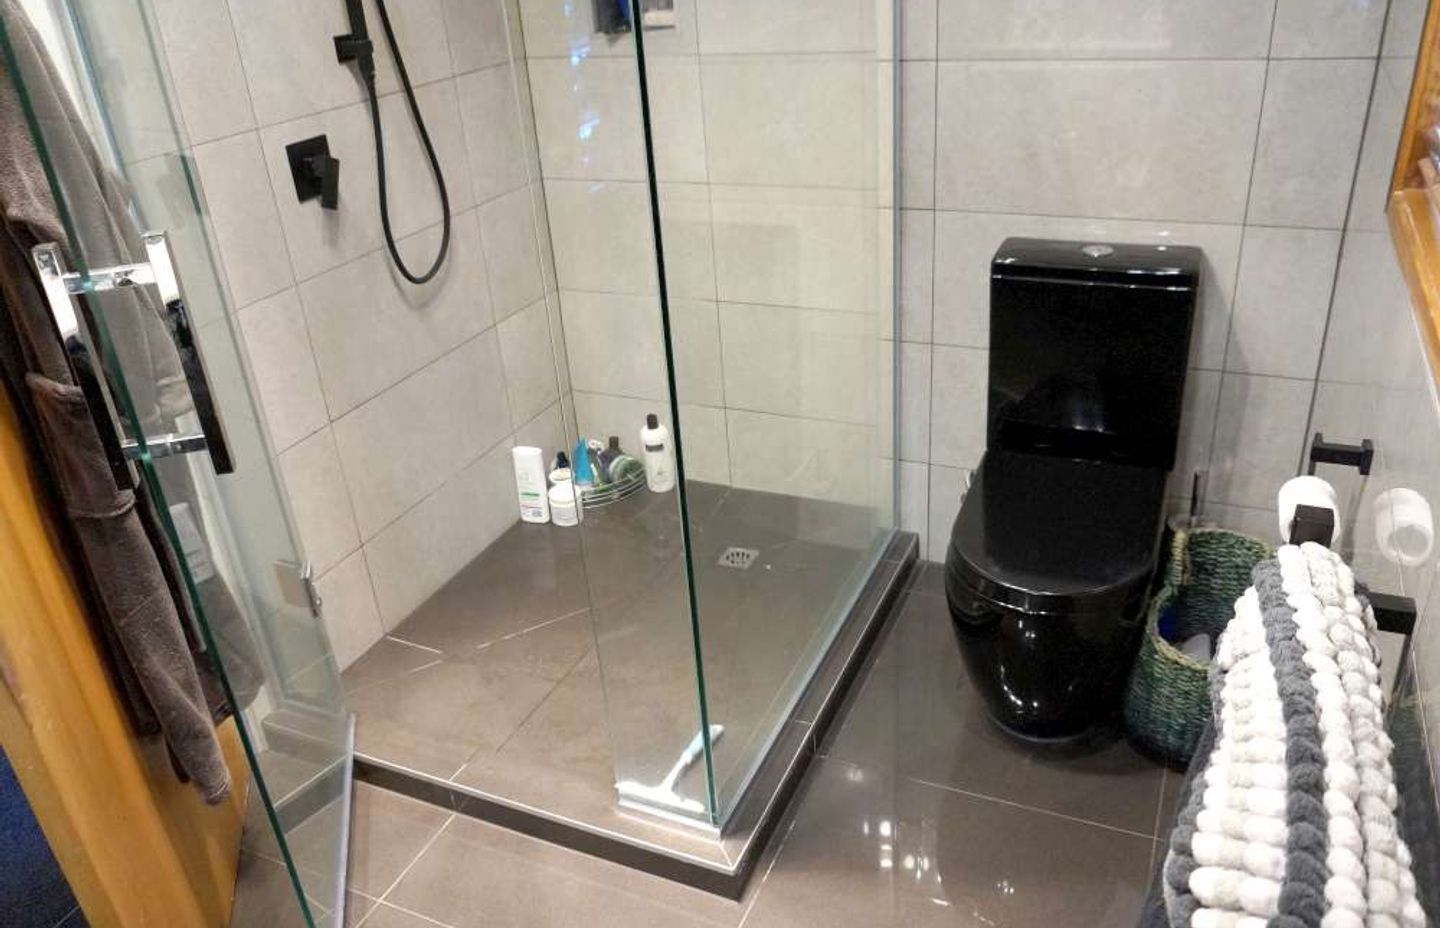
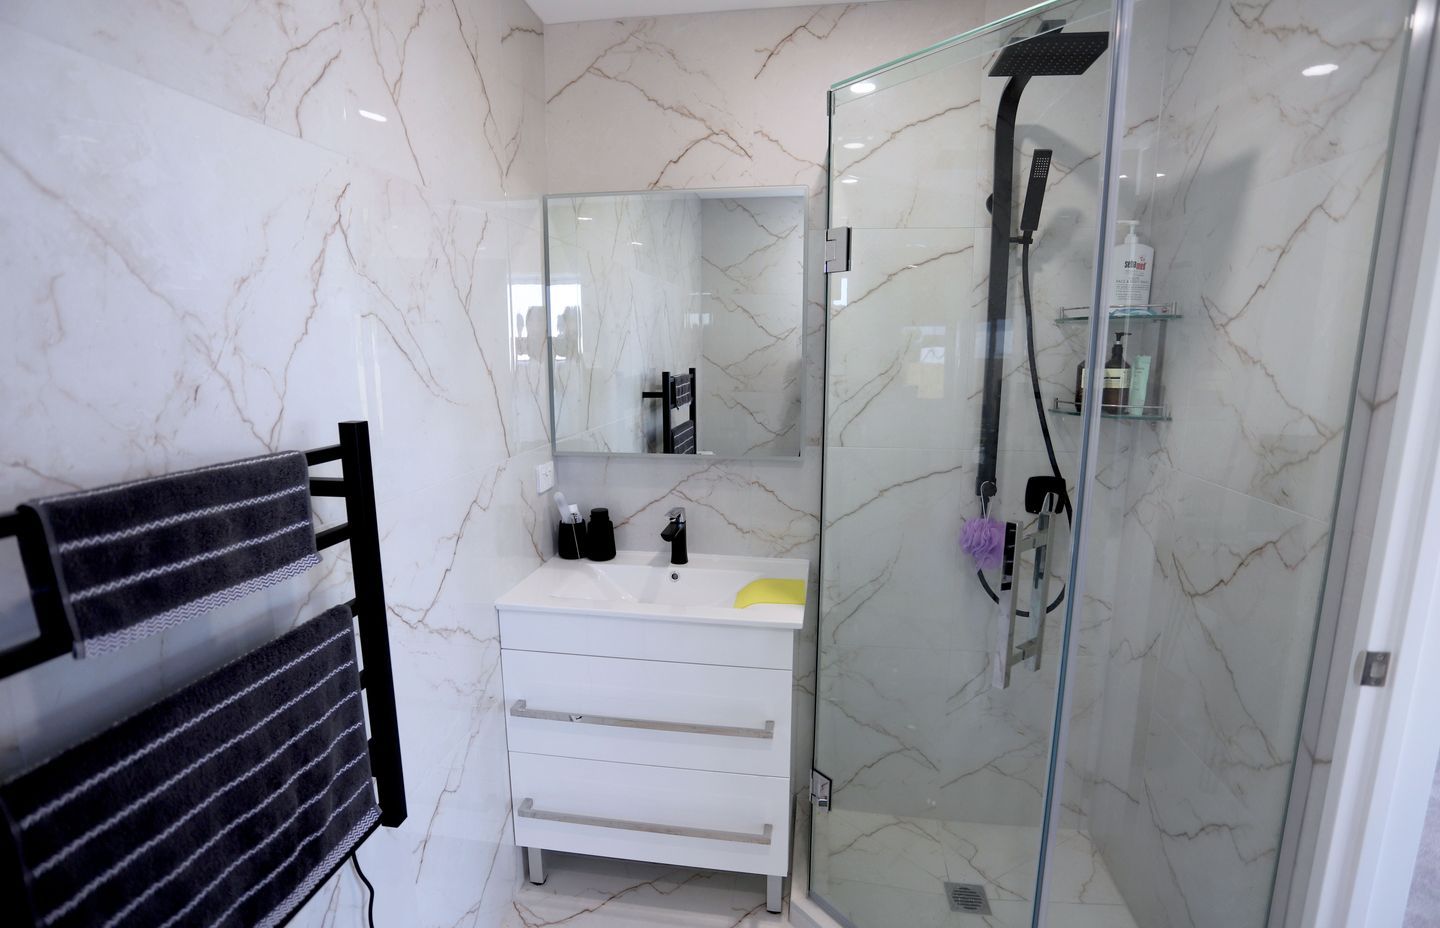
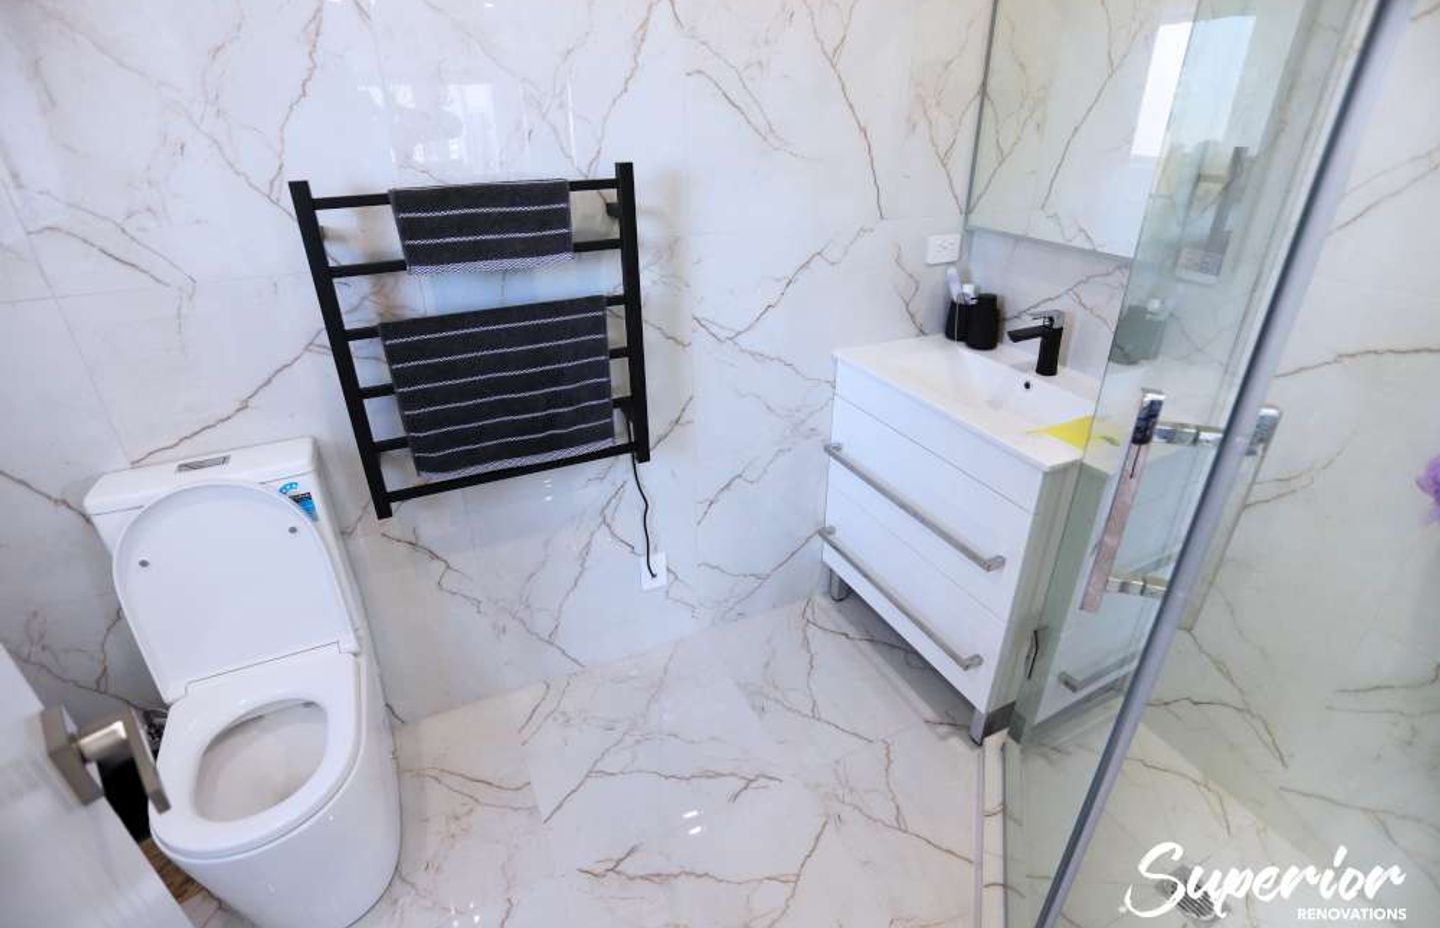
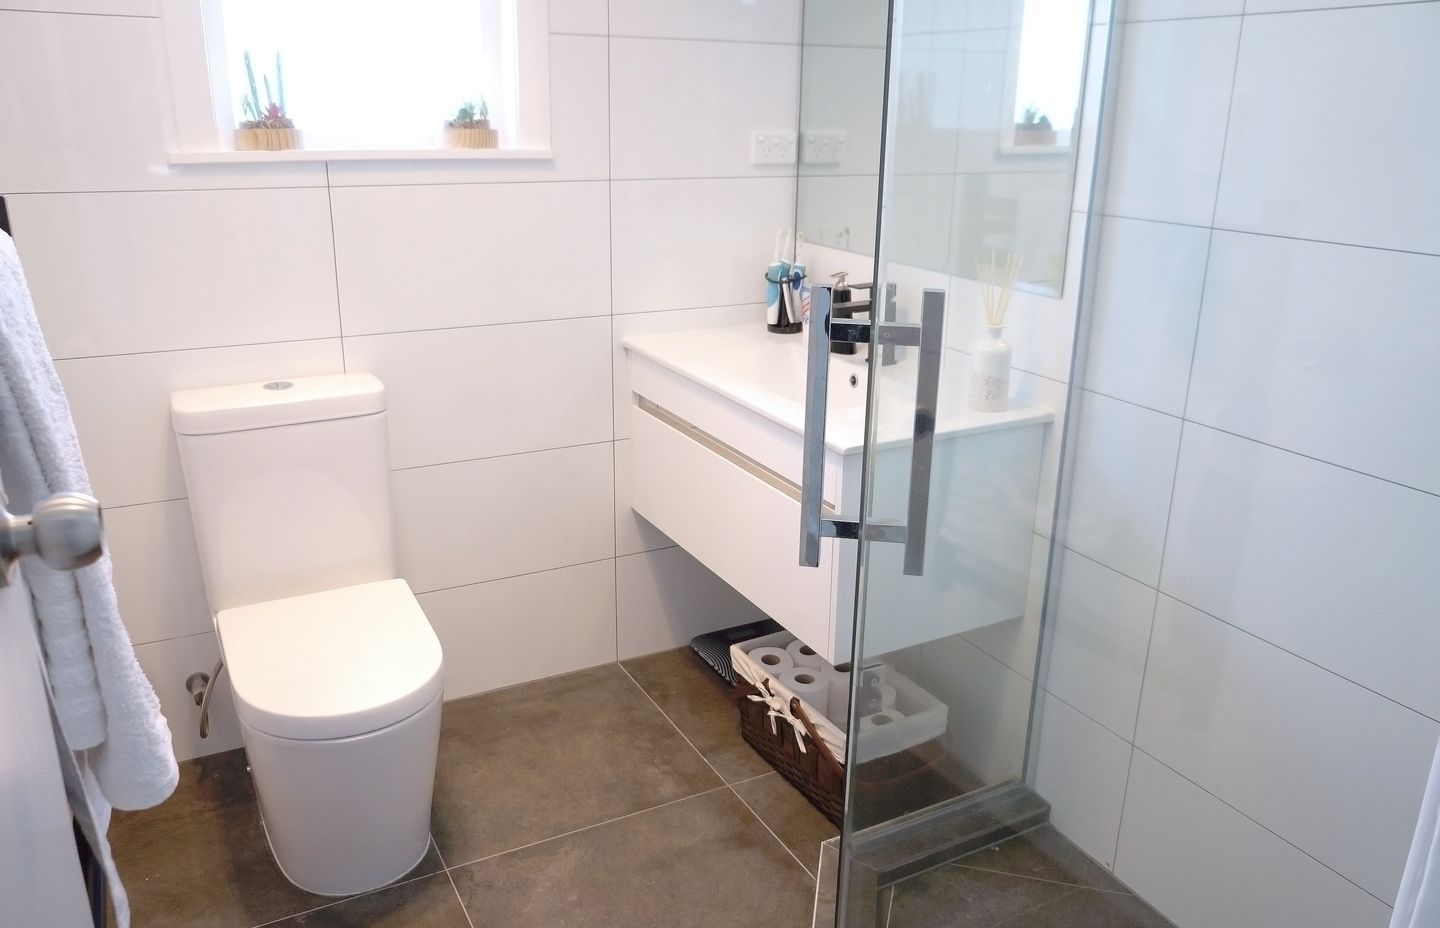
10. Use the same tiles on your walls and floors
To great trick on creating space within a bathroom is also to give it a continuous feel. This can be done by installing the same tiles throughout the walls and floors. Use large 600 by 600 or 600 by 900 tiles of the same colour and texture on your walls and floors which will give your bathroom an illusion of space.
In our bathroom renovation project below, we used the same tiles on the floors and walls to create continuity. This was a small guest bathroom which was fully renovated with a vanity, small corner shower and a toilet.

11. Open shelving, ledges, and ladder shelves
Open shelves
Try incorporating open shelving for your bathroom design if you have a small space. Open shelves make your bathroom less cumbersome and can also be aesthetically pleasing. Most fitted units from bathroom suppliers can make your bathroom feel boxed in. Open shelving gives your space a casual unfitted feeling which provides plenty of storage. You can style these shelves with baskets where you can put your toiletries, plants, or folded colourful towels.

Ledges
This is a type of open shelve but instead of a proper shelf this is a ledge that can run along the length of your bathroom. You can add decorative items and store your bathroom toilettes on this ledge. Think of a brown wooden looking ledge to give it a more contemporary or cottage style look.
Ladder shelves
Tiny bathroom ideas need to incorporate good storage solutions. Add a ladder shelf to a tiny bathroom which can be propped against a wall. This way you will also use the vertical space in your bathroom and it also adds a great design feature to your bathroom.
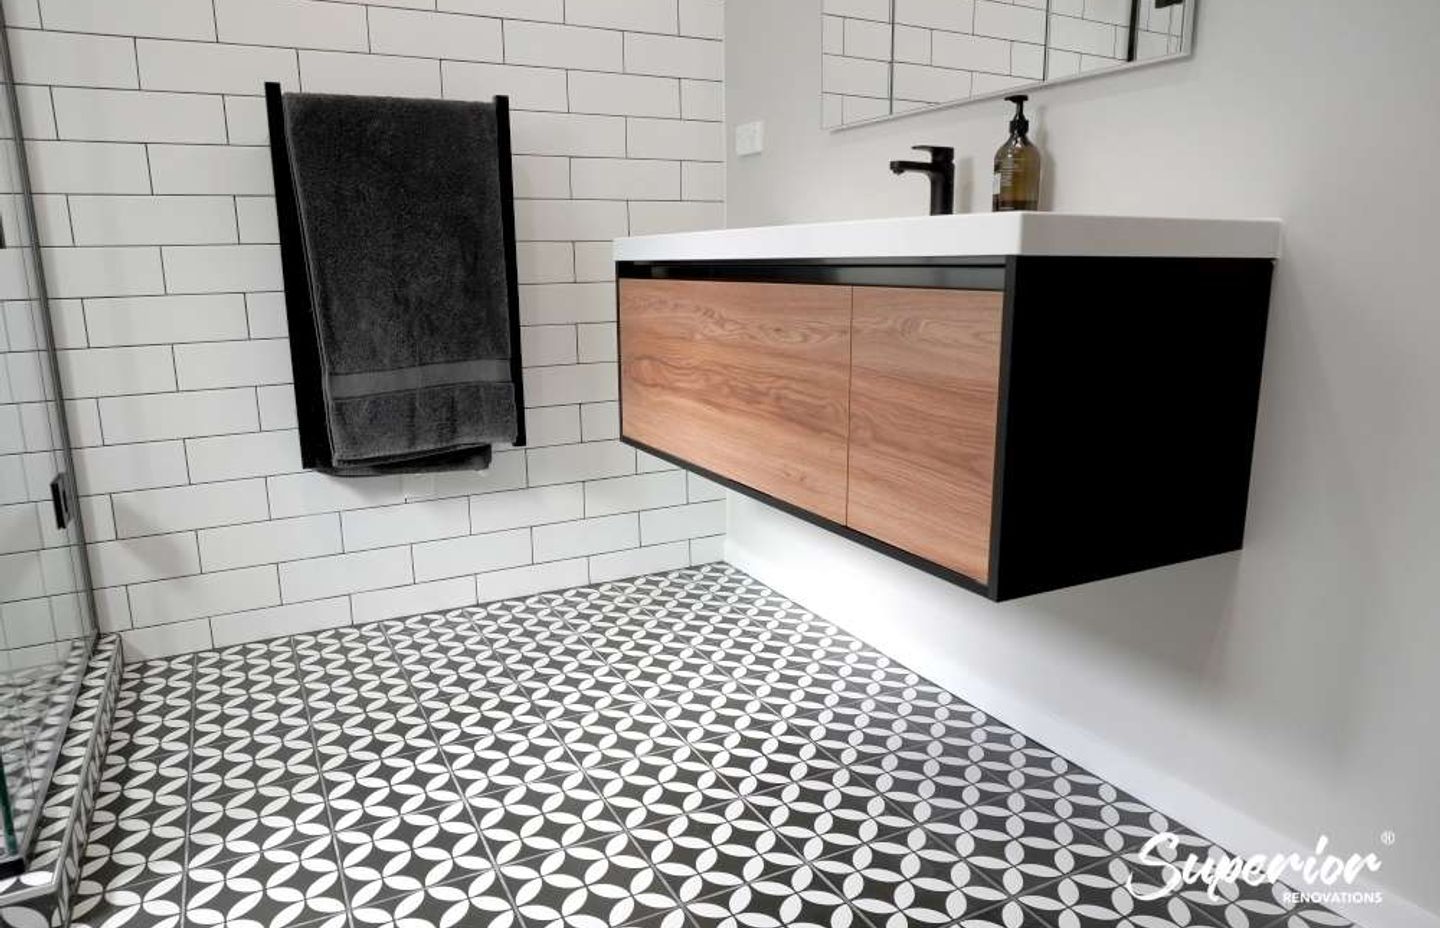
12. Colour scheme for your walls and floors
The best way to open your bathroom up is to paint the walls a light colour or install light coloured tiles. Lighter walls also reflect light which will give you an illusion of space. Lighter walls do not have to be boring anymore as there are countless textures and patterns available today. If you do not like the idea of plain white subway tiles, then think about white tiles with some patterns that can be added as a feature wall. The idea is to not make your walls look too busy.
You can however create a dark and moody look or create more interest with dark floor tiles. Dark floor tiles work well in small bathroom if most of the fixtures are not black or grey. Most small bathrooms work well with dark tiles on the floor, light walls and neutral or wooden accents.
As seen below, small and medium sized bathrooms can look spacious if dark tiles are installed on the floors and lighter tiles on the walls.
Further examples of small bathrooms with Dark floor tiles and Light Wall tiles
Dark black tiles on the floors + White Paint on the wall – Bathroom renovation in Papatoetoe
13. Use high gloss paint to reflect light
As mentioned above, lighter glossy walls will reflect light which will make your bathroom look more spacious. Keep your fixtures and flooring matte however as this would give you a more of a sophisticated look. Lighting is key for a small bathroom so think about installing good bright lighting in your bathroom. You can also think about installing a skylight in your bathroom to add more light without crowing the walls.
14. Add a shower niche
Small bathrooms are all about saving space which means finding creative storage solutions is key to an uncluttered look. Rather than crowd your shower floor or instead of adding a storage contraption in the shower, think about creating a shower niche. A shower niche is a pocket which is inbuilt into the wall of your shower where you can store your shampoo etc. You can increase a shower niche’s appeal by installing some decorate mini tiles or stones.
As seen below, we built a shower niche for a bathroom renovation in Cockle Bay. We installed small stone tiles to the shower niche to draw the eye to it and make it a design feature.
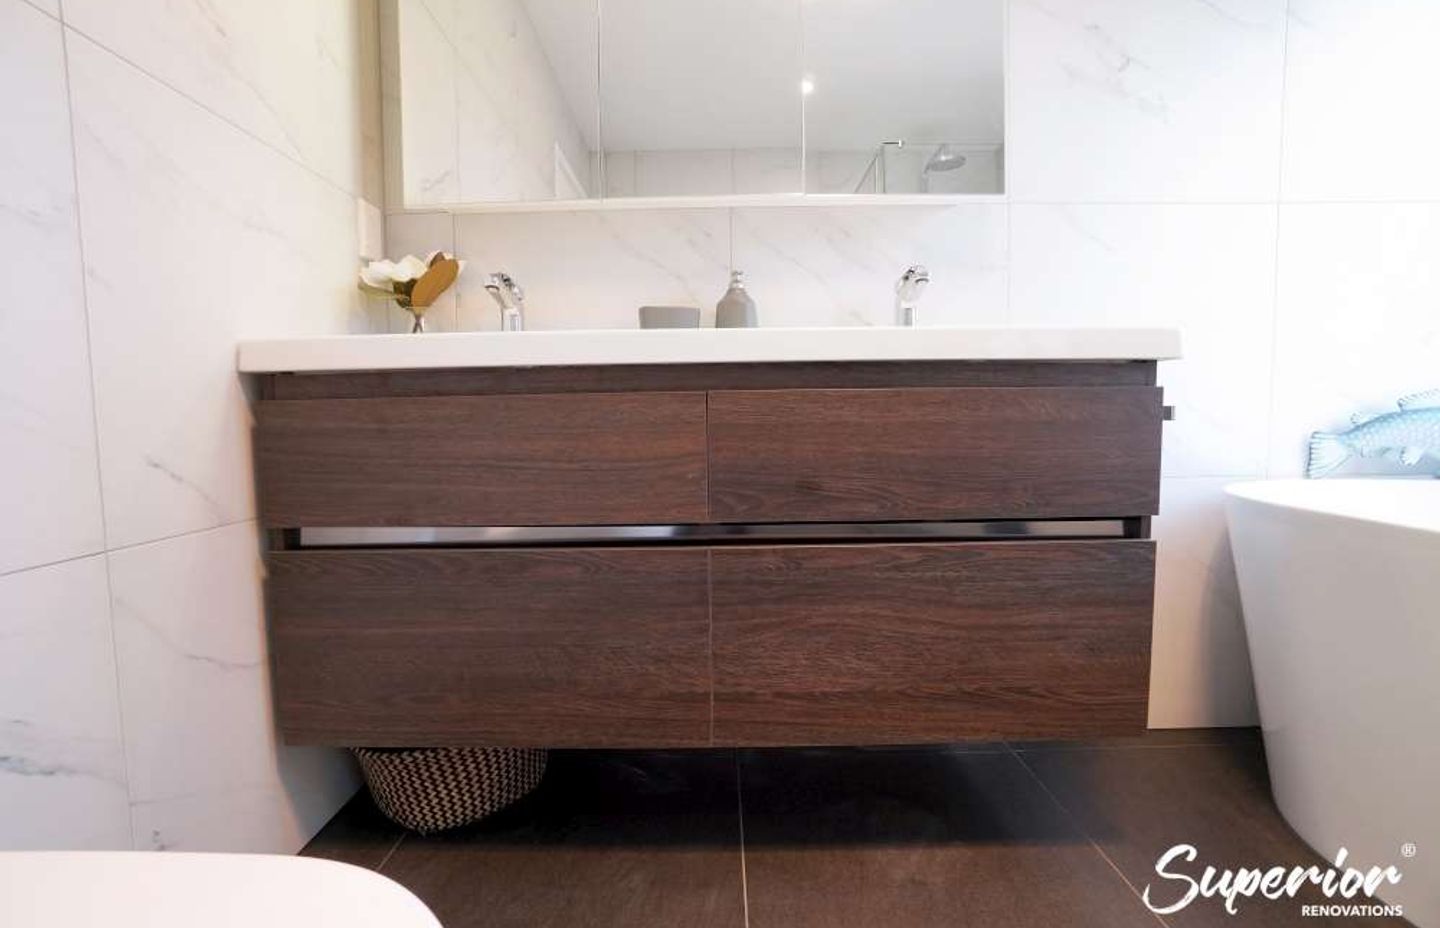
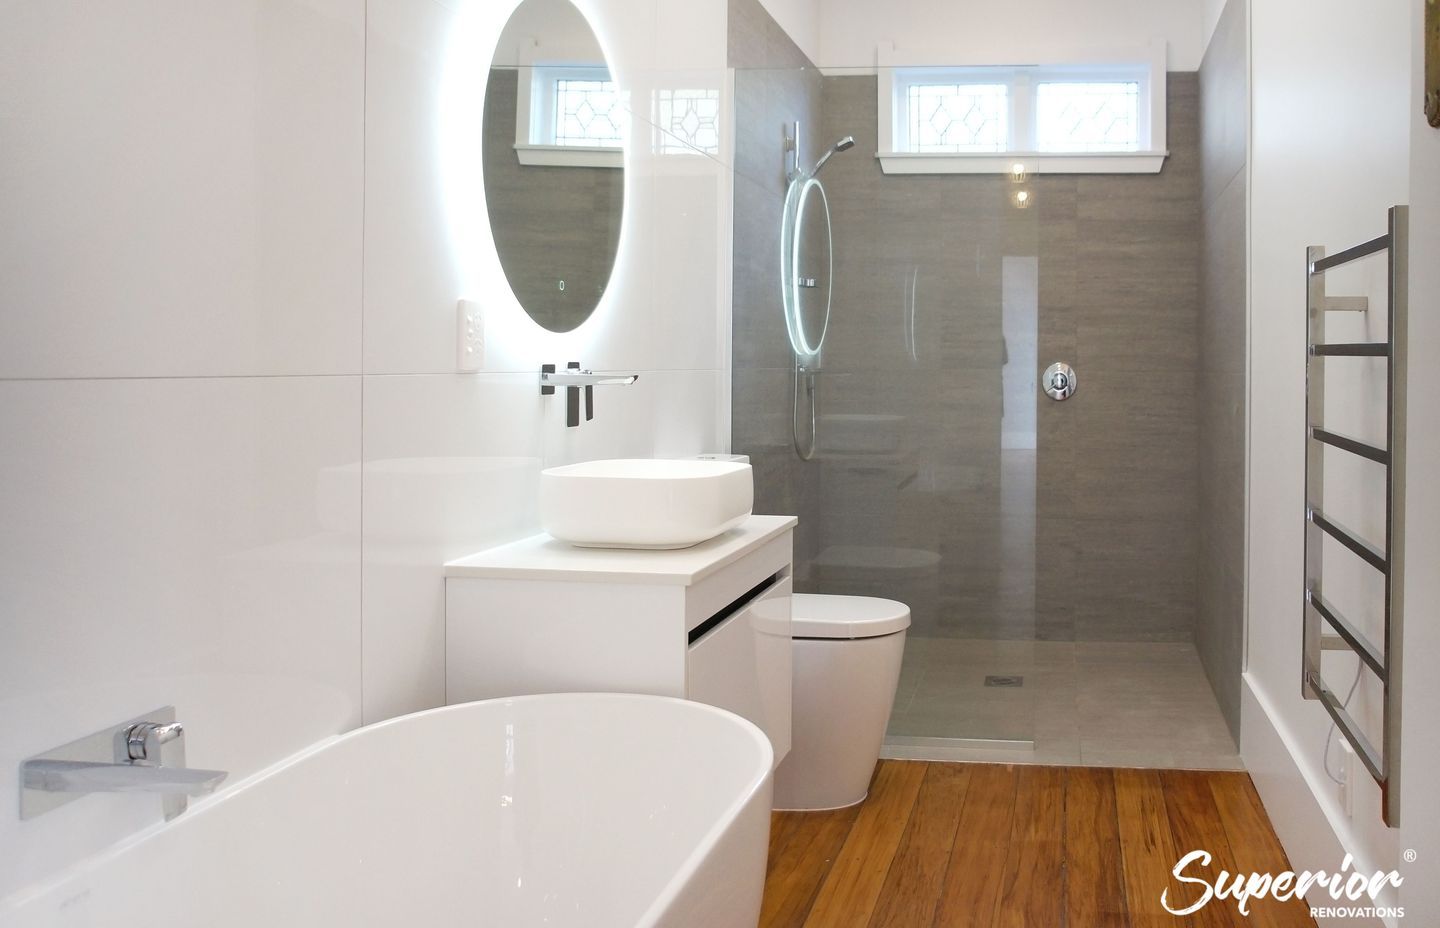
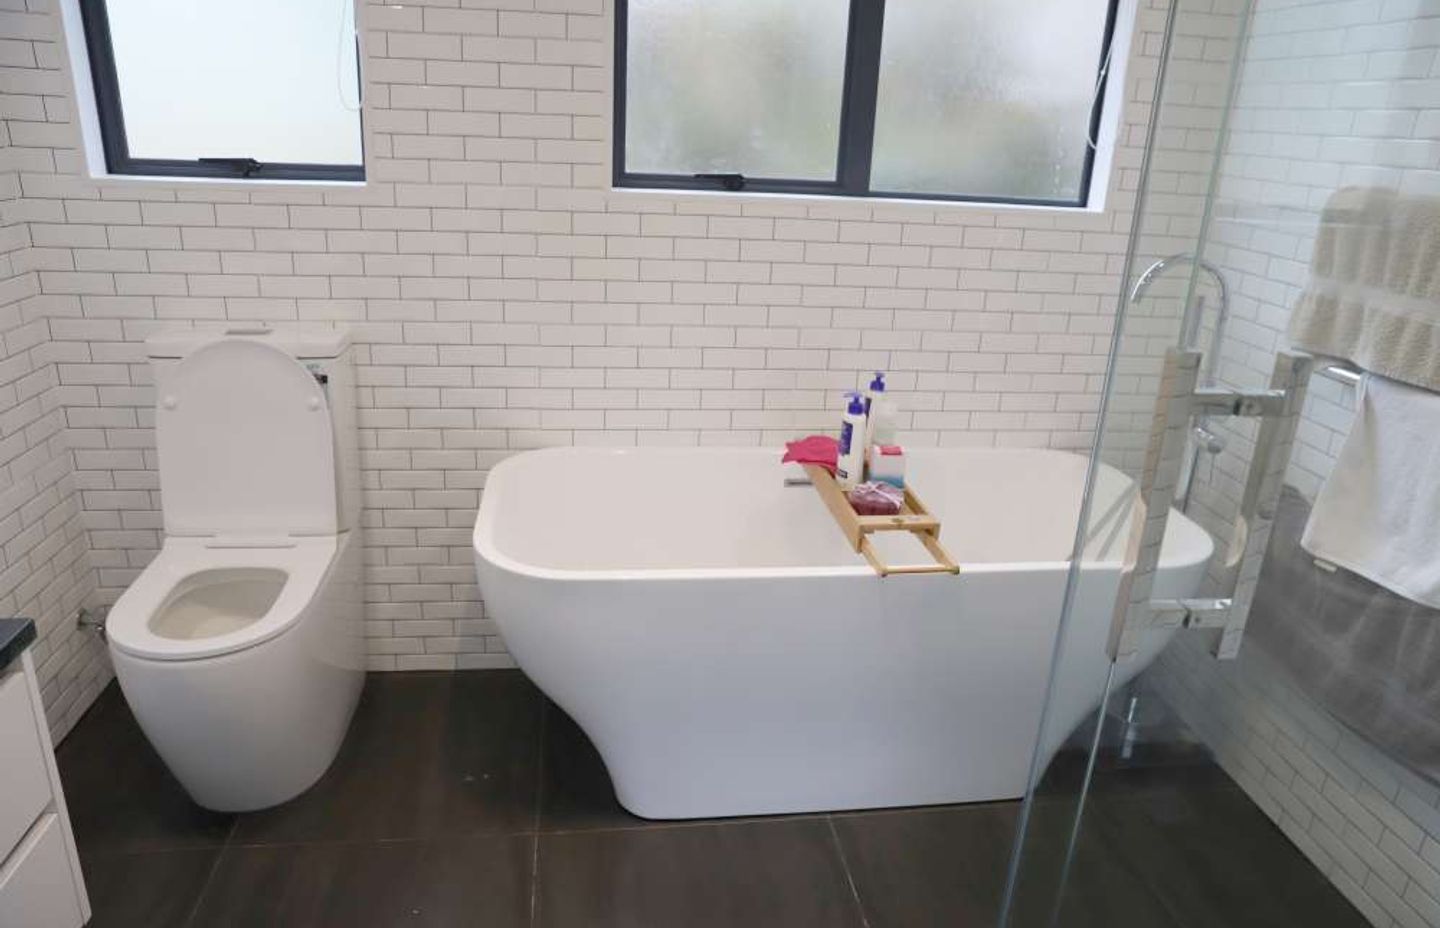
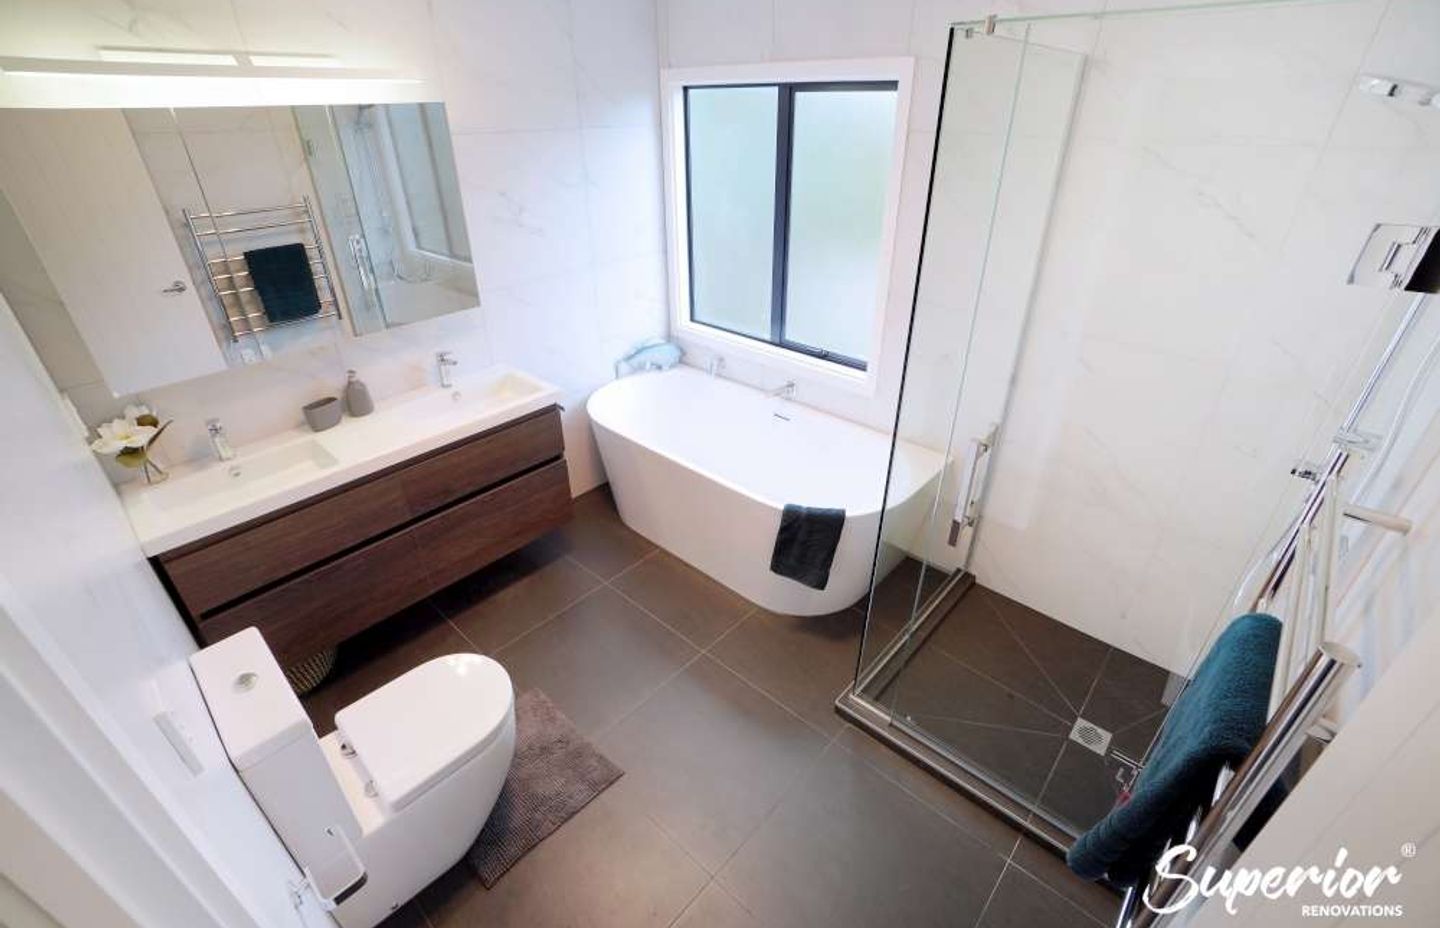
15. Use Oval shaped free standing bathtub
If you have a small bathroom then you probably cannot fit in a shower and bathtub. If you are wanting a bathtub within your bathroom design then opt for an oval free standing bathtub instead of a rectangle. This makes the area look more spacious as compared to a rectangular bathtub.
As seen in two of our renovations below, a free standing bath would save a lot more space in a bathroom than an attached rectangular bath. Installing an attached bath is easier than a free standing bath because the plumbing has to be reconfigured when installing a free standing bath. This however is not difficult if you are renovating with a renovation company.

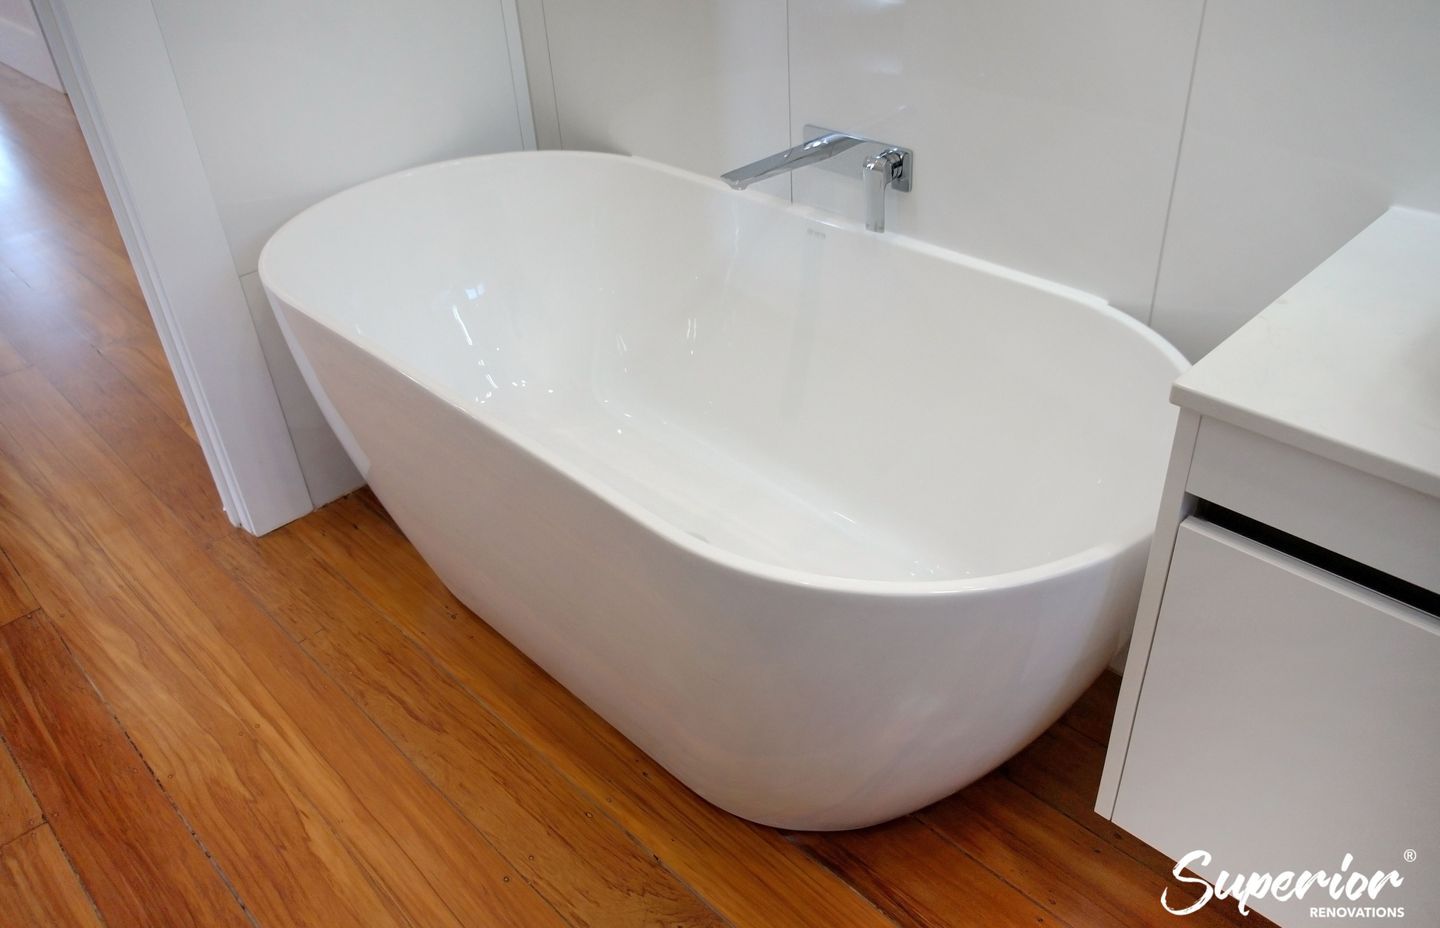
For full project specifications
Epsom bathroom renovation with an Oval shaped free standing bath