Award Winning Hemp House Part 2
When I was told that lock up is halfway through a build, I did not believe it. It is, and I now warn others not to be deluded about the time it will take to finish a house from lock-up. With the exception of the rendering and floor tiling in the bathrooms, Ben and I did the rest of the finishing and fi tout ourselves. It is very empowering to pick up tools and do it yourself, my two favourite tools being the impact driver and nail gun. Both seem to overcome a lack of big shoulder muscles.
Internal walls
Since the design of the house has few internal walls and these are around the bathrooms, I chose not to use hemp for these. Instead I chose magnesium oxide (MgO) board because I was told that as it is vapour-permeable, it works well with hemp walls and it can also be used in wet areas. It was easy to put up with fibre cement screws, and I did not need to fill the joints or screw holes, as the render later covered these up. When it came to rendering, however, it was very hard to get the render to stick to the MgO board, causing huge headaches for our renderers and the final finish is a different texture to that on the hemp walls. I am not a fan of plasterboard and considered its installation too difficult a task to tackle myself. Instead, the ceilings were lined with BB grade (includes large knots, plugs etc. so check carefully) hoop pine plywood. The roof had AIR-CELL insulation/sarking under the Colorbond. We then installed sheep’s wool bulk insulation between the rafters. This was just jammed in where possible, or held in with a couple of staples where needed. The rafters were deep enough to allow a good gap between the AIR-CELL and the bulk insulation.
Ceilings
For the ceilings in the main living area and bedrooms, black shadow lines were used between the sheets of ply. In the hall and bathrooms, no shadow lines were used as it would have looked too busy in such small areas. In the main rooms blocking was attached between the rafters along the joints in the plywood sheets and the plywood was attached to the underside of the rafters. The semi-trailer load of internet timber came in handy again for the blocking. Both the rafters and blocking were painted black, using Resene VOC Free paint, where they would be seen in the gaps between the sheets of ply. I also undertook the time-consuming task of carefully painting the edges of each of the sheets of ply black. I even routed a groove around the edge of the boards where they met the walls. The groove was painted black and the 10mm of ply beyond the groove was to be a render stop. This proved quite fiddly and after doing this in the three bedrooms we did not continue it in the main living area. Except in the bathrooms and laundry, the ply was left unsealed. In the wet areas, I coated the ply with two coats of Ecolour Polyclear.
Attaching plywood
To assist with putting the plywood sheets up, I bought a panel lifter through eBay for less than the cost of two days hire. The ply was then attached to the rafters using Bostik Ultraset SF flooring glue along the centre of the sheet; to hold the ply, particularly while the glue went off. Brads were used at 150mm centres along the edges of the sheets and 300mm centres along the rafters through the middle. The heads of the brads are small and from a distance cannot be seen. I tried fi lling the small holes left by the brads with colour matched wood fi ller, but this made the holes more noticeable and was more work. I am really happy with the finished ceiling and love looking up at the swirling patterns in the plywood.
Rendering
While Ben and I were installing the ceilings and internal walls we carried out a number of tests to find the right colour for our render. We were using a premixed render from the Australian Hemp Masonry Company, which had some fine hemp fibre in it. The plain colour of the render was not to my liking so we experimented with adding oxide. The variables were the colour of the oxide, the intensity (i.e. amount used) and the colour of the sand added. We wanted a colour reminiscent of beach sand. Although we had earlier rejected the yellow oxide, further tests showed that it was much more appealing when less intense, and we settled on the yellow. A 15kg bag of oxide more than did the whole house. In order to get consistent colour in each batch of render, I bought some jewellery scales (again on eBay) that were accurate to 1/100th of a gram. I then measured out the correct amount of oxide into snap lock bags, so that it was just a matter of mixing one bag per mix of render. The oxide was dissolved in a little water before it was added to the render, to ensure that it mixed evenly and did not form any lumps. Not trusting my rendering skills I employed a renderer to do the house. The small amount of rendering I did, I found very hard work, particularly on the shoulders. As the hemp walls were already fl at the render was applied in a single 8–10mm coat. Our renderer found that the hemp fibres in the render made the render mix much less plastic and much harder to move around than cement or lime render. Our first renderer was unable to finish the job and we had to engage another one to finish the inside and do the outside of the house.
Doors
To finish the house we had to remove the temporary piece of OSB covering the front door and install a proper door. All the internal doors in the house are cavity sliding units. I used the Hume Statesman units, but removed the timber jamb that came with them and installed Tasmanian oak to match the timber reveals on the windows and sliding door. This also meant that I could size the timber, as in my windows, to be my render stop. The front door was my first hinged door to hang, my only previous experience being a shed door. I made the front door jamb out of Tasmanian oak. So that the front door would fit the jamb properly, I installed the hinged side of the jamb, hung the door and then made the rest of the door jamb around it, with excellent results.
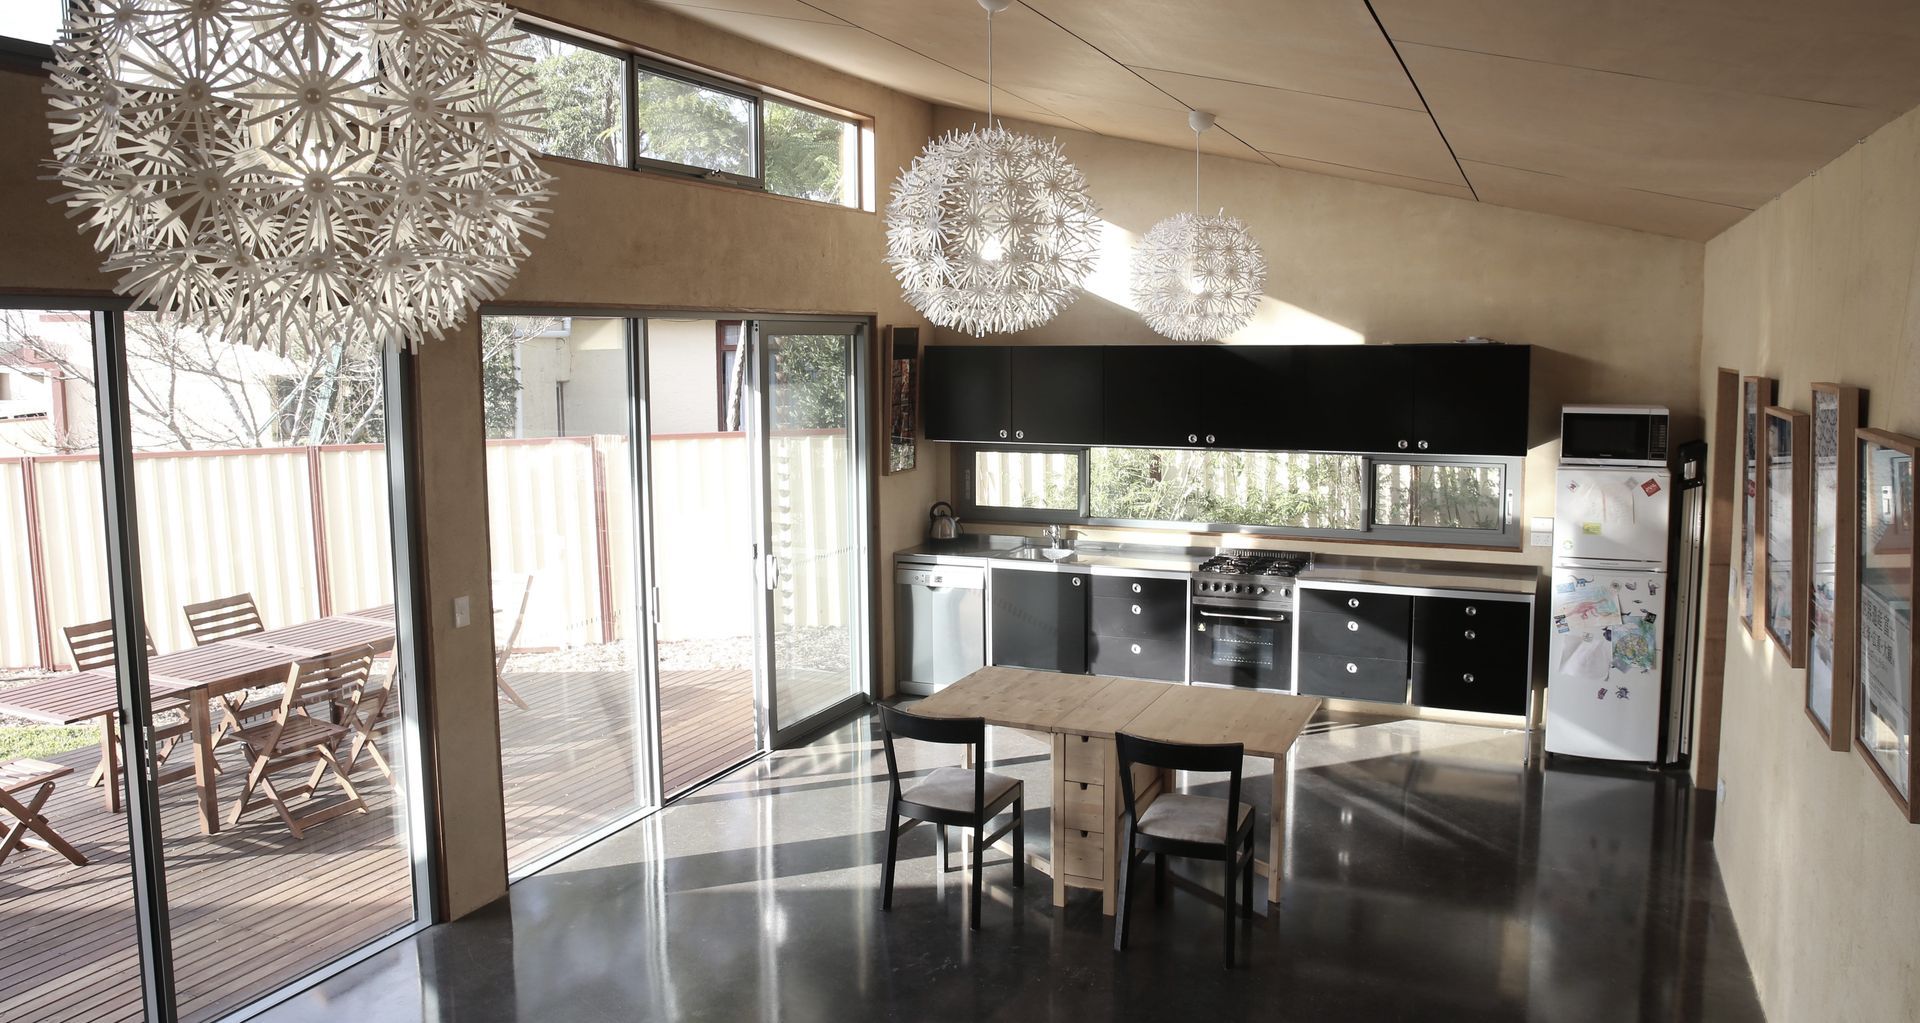
Kitchen and bathrooms
A tiler did the floors and walls in one bathroom. The front of the bath is finished with some Moroccan tiles, which I wanted to use uncut, two high on the front of the bath. The tiler gave me some measurements and I made the timber bath support up to fi t the tiles exactly. I think I over-engineered the bath support, but I had plenty of timber to use. Where there was a large area of tiling against the hemp wall, such as in the shower, I put a sheet of MgO board over the hemp. However, above the bath, I had set the window reveal out 10mm as my render stop. If I used a sheet of MgO plus the tiles, the tiles would stick out past the window reveal. So the waterproofing compound went straight on the hemp wall and the tiles onto that, finishing perfectly flush with the timber window reveal. The budget flat pack kitchen from IKEA went together easily with an Allen key. The floor units are in fact freestanding and not attached to the wall at all. The range hood was not so easy. We wanted to hide the range hood in an overhead cupboard. However, the unit we purchased was larger than the size specified in the catalogue and did not fit, so a different unit had to be purchased. The second unit was taller and this put the exhaust duct in a different location. A 200mm elbow of plumbing pipe was used as the ducting, taking the exhaust out the wall behind the cupboard. LED strip lights were installed under the overhead kitchen cupboards, with the 12-volt driver hidden on top of the cupboards and the wiring in a false bottom added to the two cupboards where the strips of light ended. The kitchen cupboards were attached to an extra noggin put in during the construction of the frame, as the hemp walls alone would not have taken the weight of the cupboards. But smaller items, like the toilet roll holders and bathroom mirror, were attached directly to the hemp walls, just with long screws, ensuring not to over tighten them. No masonry anchors or pilot holes were used. I made a fitted laundry bench from half a table I bought from the IKEA reject section. Into this went around sink, purchased for but not needed in the kitchen.
Problems
Where we had used a wall-mounted exhaust fan in the bathroom, due to low ceiling depth, we had used some ducting stuffed with waste packaging to create a void when the hemp wall was formed. We had not done this in the kitchen and so had to create a hole in the wall. It is not hard to use an angle grinder with a masonry disk to cut through the hemp wall, but at the location of the exhaust duct was a stud and a noggin. The ducting was angled to try to miss the stud, but the stud still needed to be thinned down a little to allow the ducting to pass. While taking the wall out I located the power cable for the range hood power point but cut through a power cable not realising that there was a second one there. It was the low point in the build. The rendering work had stalled, we had problems with the plywood and when the power cable was cut though, it was the straw that broke the camel’s back. I sat down and cried. I realised that tears were often part of the building process and this helped me get through the crisis. The electrical disaster was fixed by uncovering more of the cable and relocating the power point to where the cut was.
Final touches
A few final touches were the addition of framed tenugui (pieces of printed fabric) and posters from Japan, in Tasmanian oak frames to match the window and door frames, and a timber slab dining table made from a pine tree felled and milled from a friend’s property. While I was building a number of people said to me, ‘I wish I could build a house by the beach’ and they could too. All it takes is determination, organisation and a willingness to learn. Building my own house gave me the confidence and inspiration to do my Diploma of Building Design and set up my own building design business. As proof that this was the right choice, my hemp house went on to win the award for buildings up to 250m2 and under $2,000 per sqm at the National Building Designers Australia awards.