Renovation Inspiration Photos: What to Save and Why
featuring Superior Renovations

- 198.3K profile views
- 115 saves
Saved a folder of renovation photos? Here is what they hide, which parts a builder prices, and how one line under each photo turns them into a brief a designer can draw.
Featured Professionals
Written by
 Swati Tiwary
Renovation inspiration photos are the cheapest design tool you'll ever use, and the easiest to misread. A saved image can tell a designer in two seconds what would take you a page to describe. It can also hide the lens, the styling, the light and the house it was taken in, which is how a dream bathroom turns into a quote that makes no sense.
The fix is simple. Save fewer photos, and write one line under each one saying exactly what you like about it. That line turns a picture into something a designer can draw and a builder can price. At Superior Renovations we've run more than 1,000 Auckland renovations. The photos that help most at a first meeting are the ones with a note underneath.
So what should you save, what should you ignore, and how do you take the lot to a first meeting without paying for a redesign later? The answers sit in what a photo shows and what it leaves out.
What a Saved Photo Is Actually For
A photo is a shortcut for a feeling. You see a kitchen and think "that's us", and the photo carries that reaction straight to your designer. That's its job, and it does it well.
What a photo can't do is tell anyone which part of the room you're reacting to. Is it the timber, the long run of benchtop, the way the light falls across the island, or just the fact the room is tidy? A designer who guesses wrong will draw you the wrong kitchen, beautifully.
That's why building.govt.nz's guidance on choosing the right people for your building work asks homeowners to be as detailed as they can from the start: where lights and power points go, every appliance, the level of quality and finish. It also suggests keeping one brief document everyone works from and updating it when things change. Inspiration photos are the raw material for that document, not a replacement for it.
Our step-by-step guide to planning a renovation, with printable checklists for each stage puts it in one line of the brief checklist: ten photos you like and three you don't, with a note on why. The note is where the value sits.
What Renovation Photos Hide
A published interior photo has been made to look its best. Nothing dishonest about that. It just means a few things in the frame weren't there on an ordinary Tuesday, and a few things that matter were left out of it.
The lens
A wide lens fits a whole room into one frame, and it stretches the room while it does it. Corners pull apart, benchtops look longer and a modest bathroom looks generous. If you're comparing a photo with your own 1950s bathroom in Titirangi, measure your room before you fall for the proportions in someone else's.
The styling
In a styled shot, the fruit bowl, the linen towels, the single branch in a vase and the empty benchtop are there for the camera. Little of that costs much to copy. What it does is make a room read as calm, and calm is a styling outcome as much as a building one. Ask yourself whether you'd still love the room with your toaster, kettle and school bags in it.
The light
Daylight is the biggest thing a photo borrows and the hardest thing to bring home. A dark kitchen shot on a clear afternoon with a wall of glazing behind it will not look the same in a south-facing room under a deck. A villa in Mt Eden with tall sash windows gets different light from a 1990s brick-and-tile in Wattle Downs, and both get different light from a bush section in Titirangi. Note which way the room in the photo faces if you can tell, and which way yours faces.
The house behind it
A photo shows finished surfaces. It doesn't show what was behind them before the work started: rotten framing, a leaking waste, wiring that had to come out. Your own house will have its own version of that, and no photo can tell you what it is.
Once the old spa bath and the linings came out, the water damage we'd suspected was right there behind the shower wall. That's exactly why you don't tile over a problem — better to find it with everything open and fix it properly while we're in there.
Dorothy Li, Lead Designer and Consultant, Superior Renovations
Separating the Building From the Styling
Here's a habit that saves real money. Look at a photo and split what you see into two lists: things a builder makes, and things you could buy and put in the room yourself. The first list drives the price. The second list mostly doesn't.
Things a builder makes
- Walls that moved or disappeared, and bigger openings to the outside
- Plumbing in a new place: a shower moved to the other wall, a sink on an island
- Custom joinery: full-height cabinetry, curved ends, integrated handles, a vanity built to an exact width
- Tile layout: floor-to-ceiling tiling, large-format tiles, a tiled shower with no tray and a recessed niche
- Lighting built into the room: strip lights in joinery, pendants over an island, lights in the shower niche
Things you could add later
- Paint colour, towels, rugs, artwork and plants
- Bar stools, dining chairs and freestanding furniture
- Most accessories on a benchtop or shelf
The first list is where cost lives, and it's worth knowing roughly what it adds up to before you fall for a room. The price bands we publish for Auckland renovations put a mid-range kitchen at $26,000 to $35,000, while large (18m² and over) or premium kitchens run $62,000 to $138,000 and up. A mid-range bathroom sits at $26,000 to $35,000, and a full overhaul with retiling, a new layout and premium fixtures runs $40,000 to $60,000. A photo full of custom joinery, moved plumbing and wall-to-wall tile is a photo from the top of those bands.
Keep saving those photos, but mark which parts of them you'd pay for. If what you love about a $100,000 kitchen is the timber veneer on the island, that's a detail a designer can bring into a mid-range kitchen. If what you love is the room itself, you're looking at a different budget. You can check a rough price for the room in your photo with our cost calculators before anyone draws a line.
A Dark Bathroom That Had to Prove Itself First
Moody, dark interiors look wonderful in photos. They're also where a renovation can go wrong quickest, because a dark scheme that photographs as rich can feel like a cave in a room with one small window.
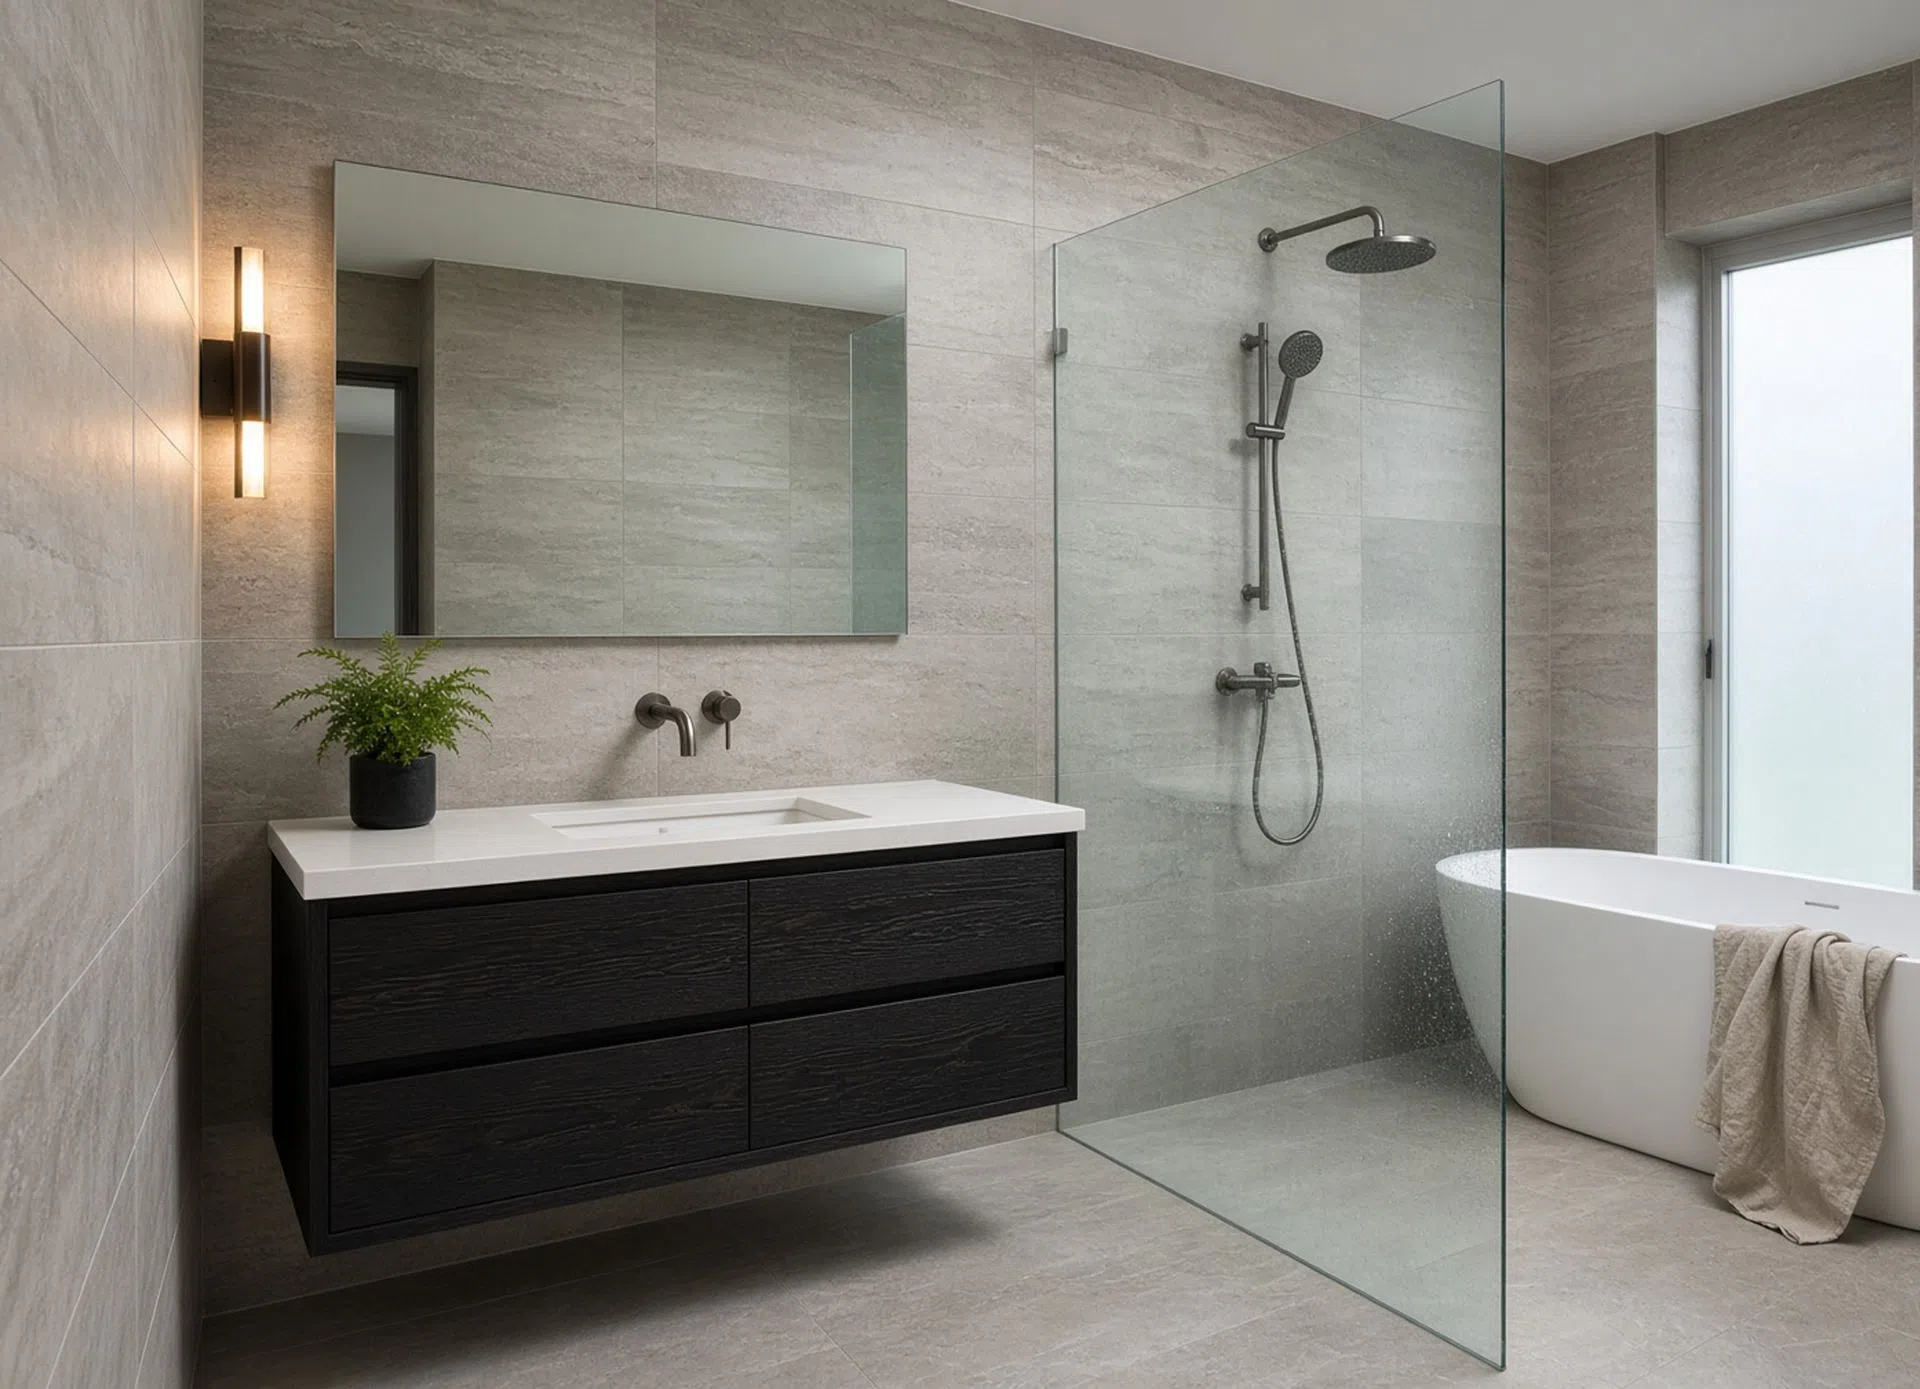
That was the brief behind the Wattle Downs bathroom case study. The house was built in the mid-1990s and so was the bathroom: original tiles, a spa bath the owners had never used, and a layout that didn't work for two people. They wanted a contemporary bathroom in tones of moody grey, and they were committed to it.
A dark bathroom can read as small or closed-in if you get the lighting wrong. So before a single tile was ordered, we ran a video walk-through with Steve and Jennifer — they got to stand inside the space at full size, and we worked out exactly where the light needed to sit.
Dorothy Li, Lead Designer and Consultant, Superior Renovations
On top of the video, the design pack ran to multiple CAD drawings, looking into the room and back out of it from the shower, the bath and the vanity. The point was to test the inspiration against the actual room before money went on materials. The finished bathroom uses grey travertine-look tiles on the walls and floor, a custom 1800mm charred oak vanity to warm the cool tones, gunmetal tapware throughout and a freestanding bath as the one bright shape in the room.
The lesson for anyone with a folder of dark interiors: the photo told the designer what the owners wanted to feel. The drawings and the walk-through showed whether their own room could deliver it, and where the light had to go to make it work.
How to Annotate Your Inspiration Photos
You don't need an app, a template or a perfect board. You need fewer photos and one honest line under each. Here's the method we suggest.
- Cut to ten. Go through everything you've saved and keep the ten you'd fight for. If two photos say the same thing, keep the clearer one.
- Add three you don't like. Rooms you'd walk out of are as useful as rooms you love. They tell a designer where the edges are.
- Write one line per photo. Name the one thing: "the timber on the island, not the stone", "the shower with no step", "the way the pendant hangs low". If you can't name it, the photo probably goes.
- Mark builder or buyer. Next to each line, note whether it's something a builder makes or something you could add later.
- Note the light. If the photo is a bright room and yours is dark, or the other way round, say so. It changes the design more than the colour does.
- Add your own room. Take a photo of the room you're changing from the doorway, plus its width and length. Every saved photo gets compared with this one.
If two people are making the decisions, do this separately first. Our advice for couples renovating together in Auckland makes the case for each of you sharing your own inspiration images rather than merging them first. Two annotated sets that disagree are easier for a designer to work with than one blended set that hides the argument.
Ten annotated photos and a picture of your own room fit on two A4 pages. That's the shape of a brief a builder can price, and it's the document building.govt.nz suggests you keep updating as the job moves.
Taking Your Photos to a Designer
A good first design meeting starts with your photos on the table and ends with a short list of decisions. Expect the designer to ask why you saved each one, and expect a few honest answers back about what will and won't work in your house.
Bring the annotated set, your room photo and its measurements, and any non-negotiables that came out of the exercise. If something in a photo needs a wall moved or plumbing relocated, ask early whether it involves consent. That's a question for a Licensed Building Practitioner, your designer or Auckland Council, and the answer should be in writing before you sign anything.
Physical samples matter too, because a photo can't show texture. A matte travertine-look tile, a charred oak veneer and a brushed nickel handle all look different on a screen from how they look in your hand at the window. Our designers work from the showroom at 16B Link Drive, Wairau Valley, and our process includes supplier visits so you can see tiles, tapware, flooring and appliances in person before they're locked in. Talk your photos through with the Superior Renovations Design Studio team, who turn a saved photo into drawings and a fixed quote.
Whoever you work with, watch how closely the first concept matches what you described. When the photos have been annotated properly, the first drawing should feel recognisably like your idea, adjusted for your room and your budget. You'll find our own case studies and design work at superiorrenovations.co.nz if you want to see how other Auckland homeowners' briefs turned out.
Frequently Asked Questions
How many inspiration photos should I take to a renovation designer?
Ten you love and three you don't is a good working number. Fewer photos with a clear note on each are far easier to design from than a board of hundreds. Add a photo of your own room from the doorway, with its measurements, so every saved image can be compared with the space you actually have.
Why doesn't my renovation look like the photo I saved?
Published photos can be shot with wide lenses, styled for the camera and taken in good light, in a house with its own size and orientation. Your room has different light and proportions. Annotating what you like in each photo helps a designer bring that element into your room rather than copying the whole picture.
Are renovation inspiration photos a good guide to cost?
Only if you separate what a builder makes from what you could add later. Moved plumbing, custom joinery, large-format tiling and new openings drive the price. Styling barely does. Superior Renovations puts a mid-range Auckland kitchen at $26,000 to $35,000 and premium kitchens at $62,000 to $138,000 and up.
Should a couple make one mood board or two?
Make two first. Each person saves and annotates their own photos, then you compare them with your designer. Merging boards early hides the disagreements, and they come back later as changes during the build. Two honest sets give the designer the real brief and a clear picture of what each of you needs.
Your saved photos already say a lot about the room you want. Cut them to ten, write one line under each, and they'll say it in a way a designer can draw and a builder can price. When you're ready, book a free consultation and bring the ten photos you'd keep, and we'll go through them with you in your own house.
References
Like this Article?
Get in touch with Superior Renovations
Discover More Readingin Building & Renovating



Next Article
Keep scrolling
Material Brief: Specifying timber across your project